HOW TO: Create a Photoshoot
A successful photoshoot requires a lot of coordination, communication, and a clear vision with your team and subjects. Running your own photoshoot can be intimidating, even for an experienced photographer. While having some technical knowledge or experience in assisting photoshoots is always a plus, it’s never impossible, even for a novice, so long as you plan properly!
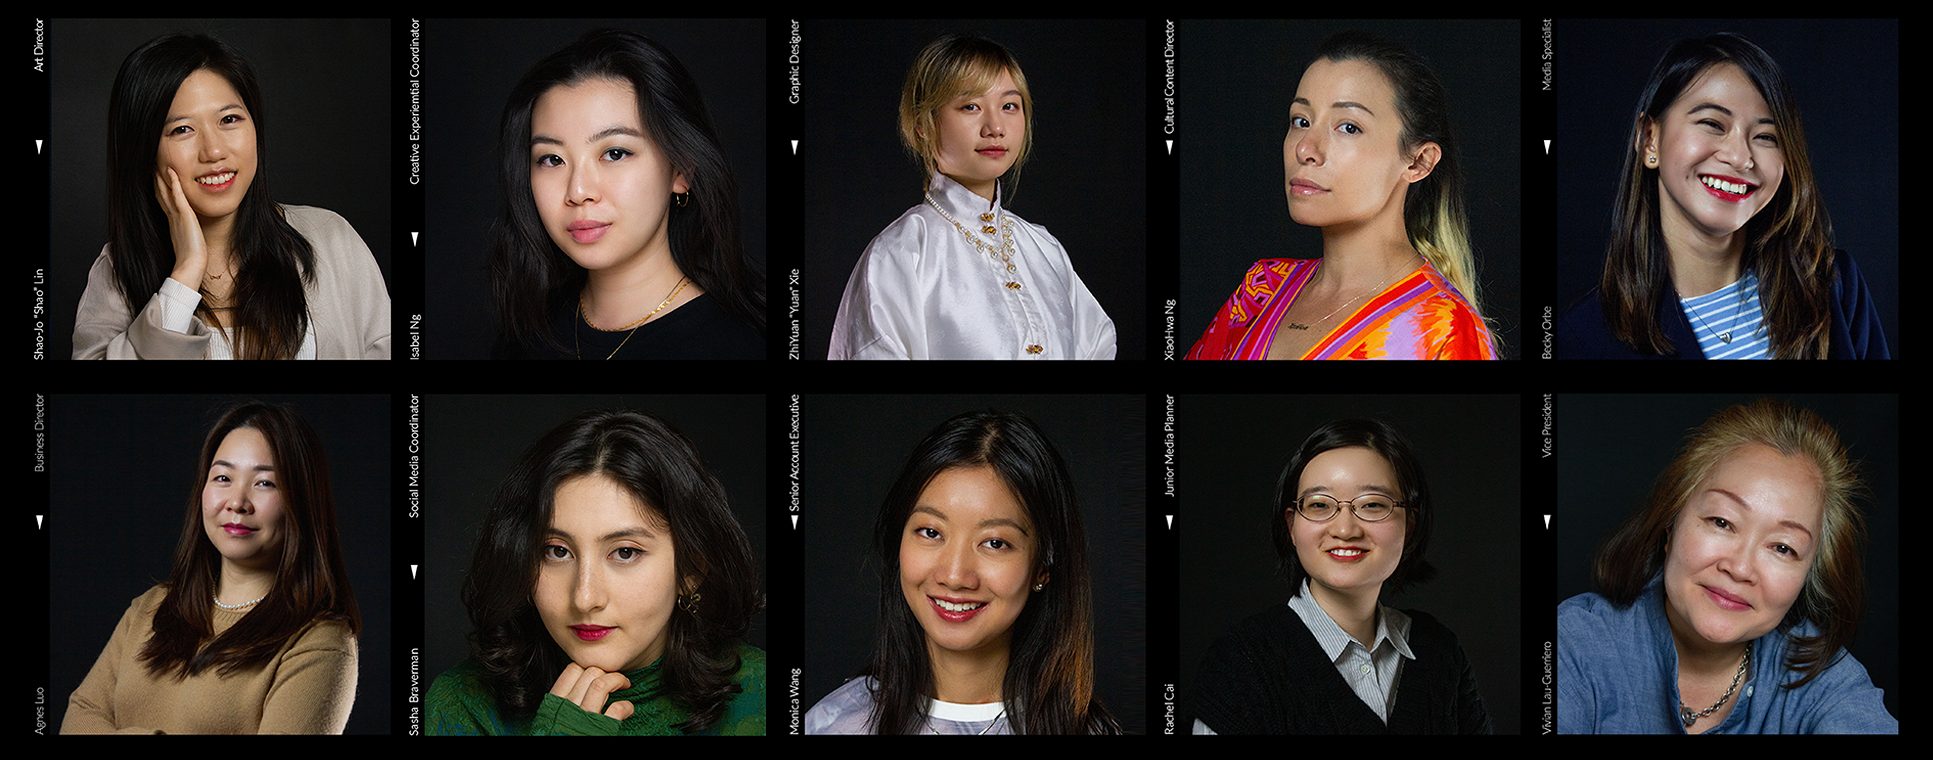
Our amazing Creative & Experiential Coordinator, Isabel Ng, shares her process as the lead photographer of our Women History Month campaign. Our photoshoot featured 10 models and took around three weeks to brainstorm, coordinate, shoot, and edit.
Step 1: Prep and Research
Before any actions are taken, it’s best to have a vision in mind.
Research
Talk to your client. Find out what the subject matter is and what kind of message they are aiming to portray through these images. What’s on the initial shot list? What are your must-haves vs nice-to-haves? You can always build on this once you get a better sense of the vision.
Things to ask: Budget? On-location or in-studio? What kind of environment will you be shooting in? What equipment is available, if not your own? Shot list?
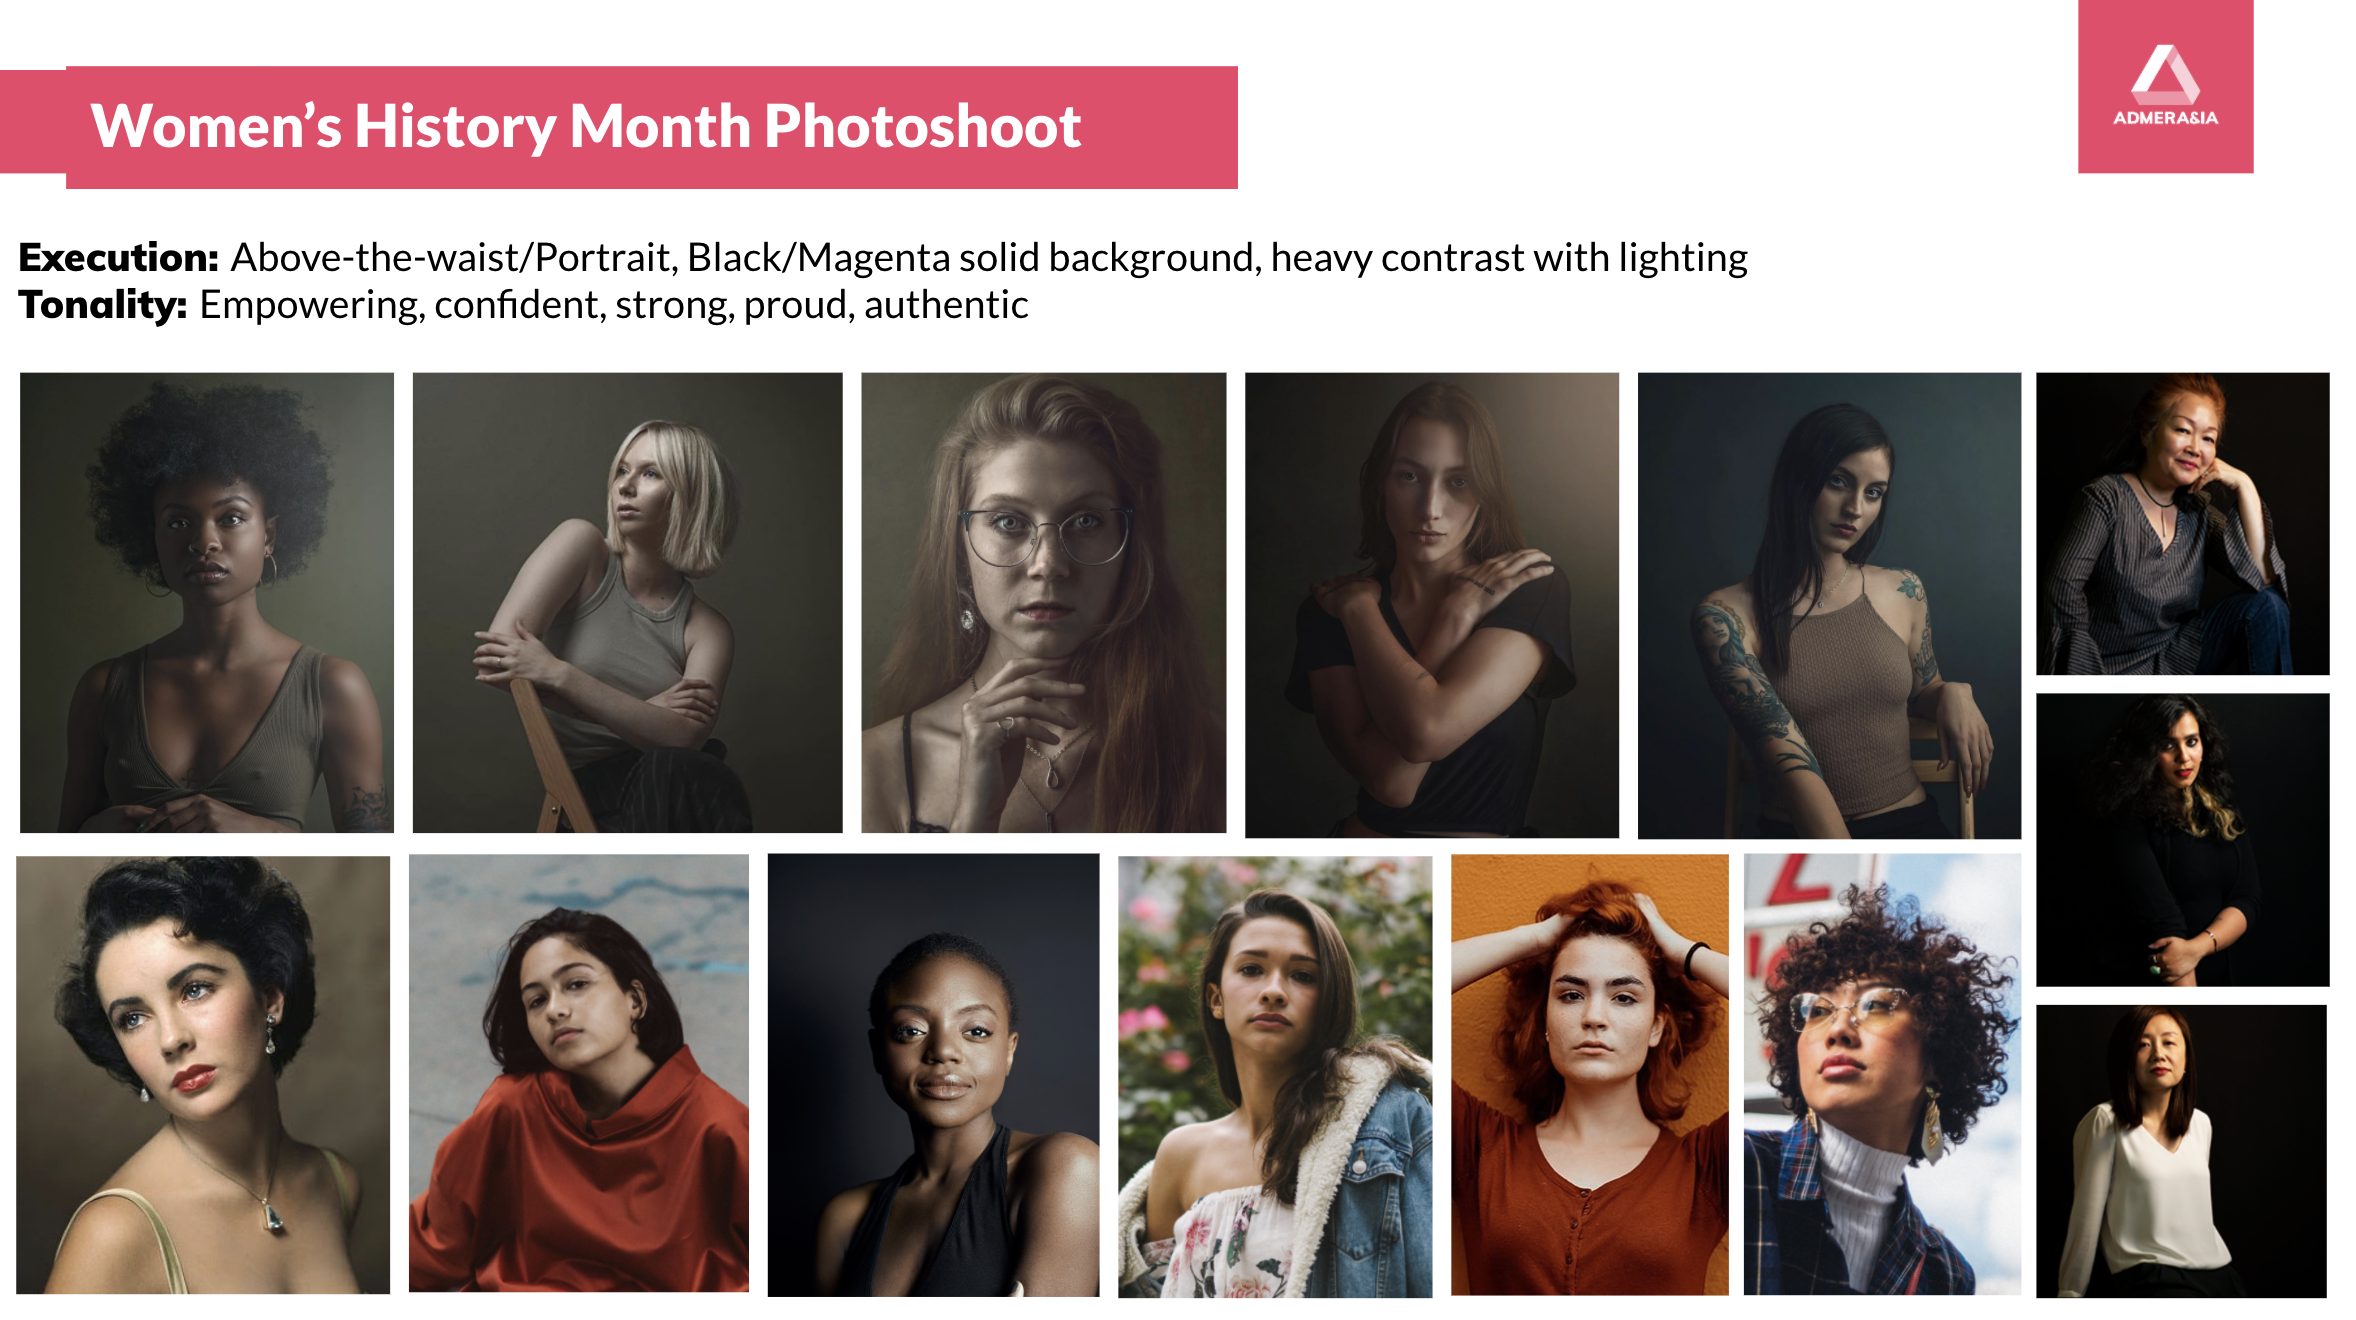
Moodboards
Moodboards create visual references of poses and expressions for your models, narrow down props, locations, and set designs–building the aesthetic and tonal framework for you to share with your crew and subjects.
Step 2: Set Up
It’s time to start gathering your tools and set up your space! While we used very minimal props for this shoot, it is always good to have a set designer if you want to create an environment that compliments your vision.
Equipment
You don’t always need a fancy camera – you can shoot with anything, even your phone! While gear quality is important, lighting, composition, and subject theme are the core elements to focus on.
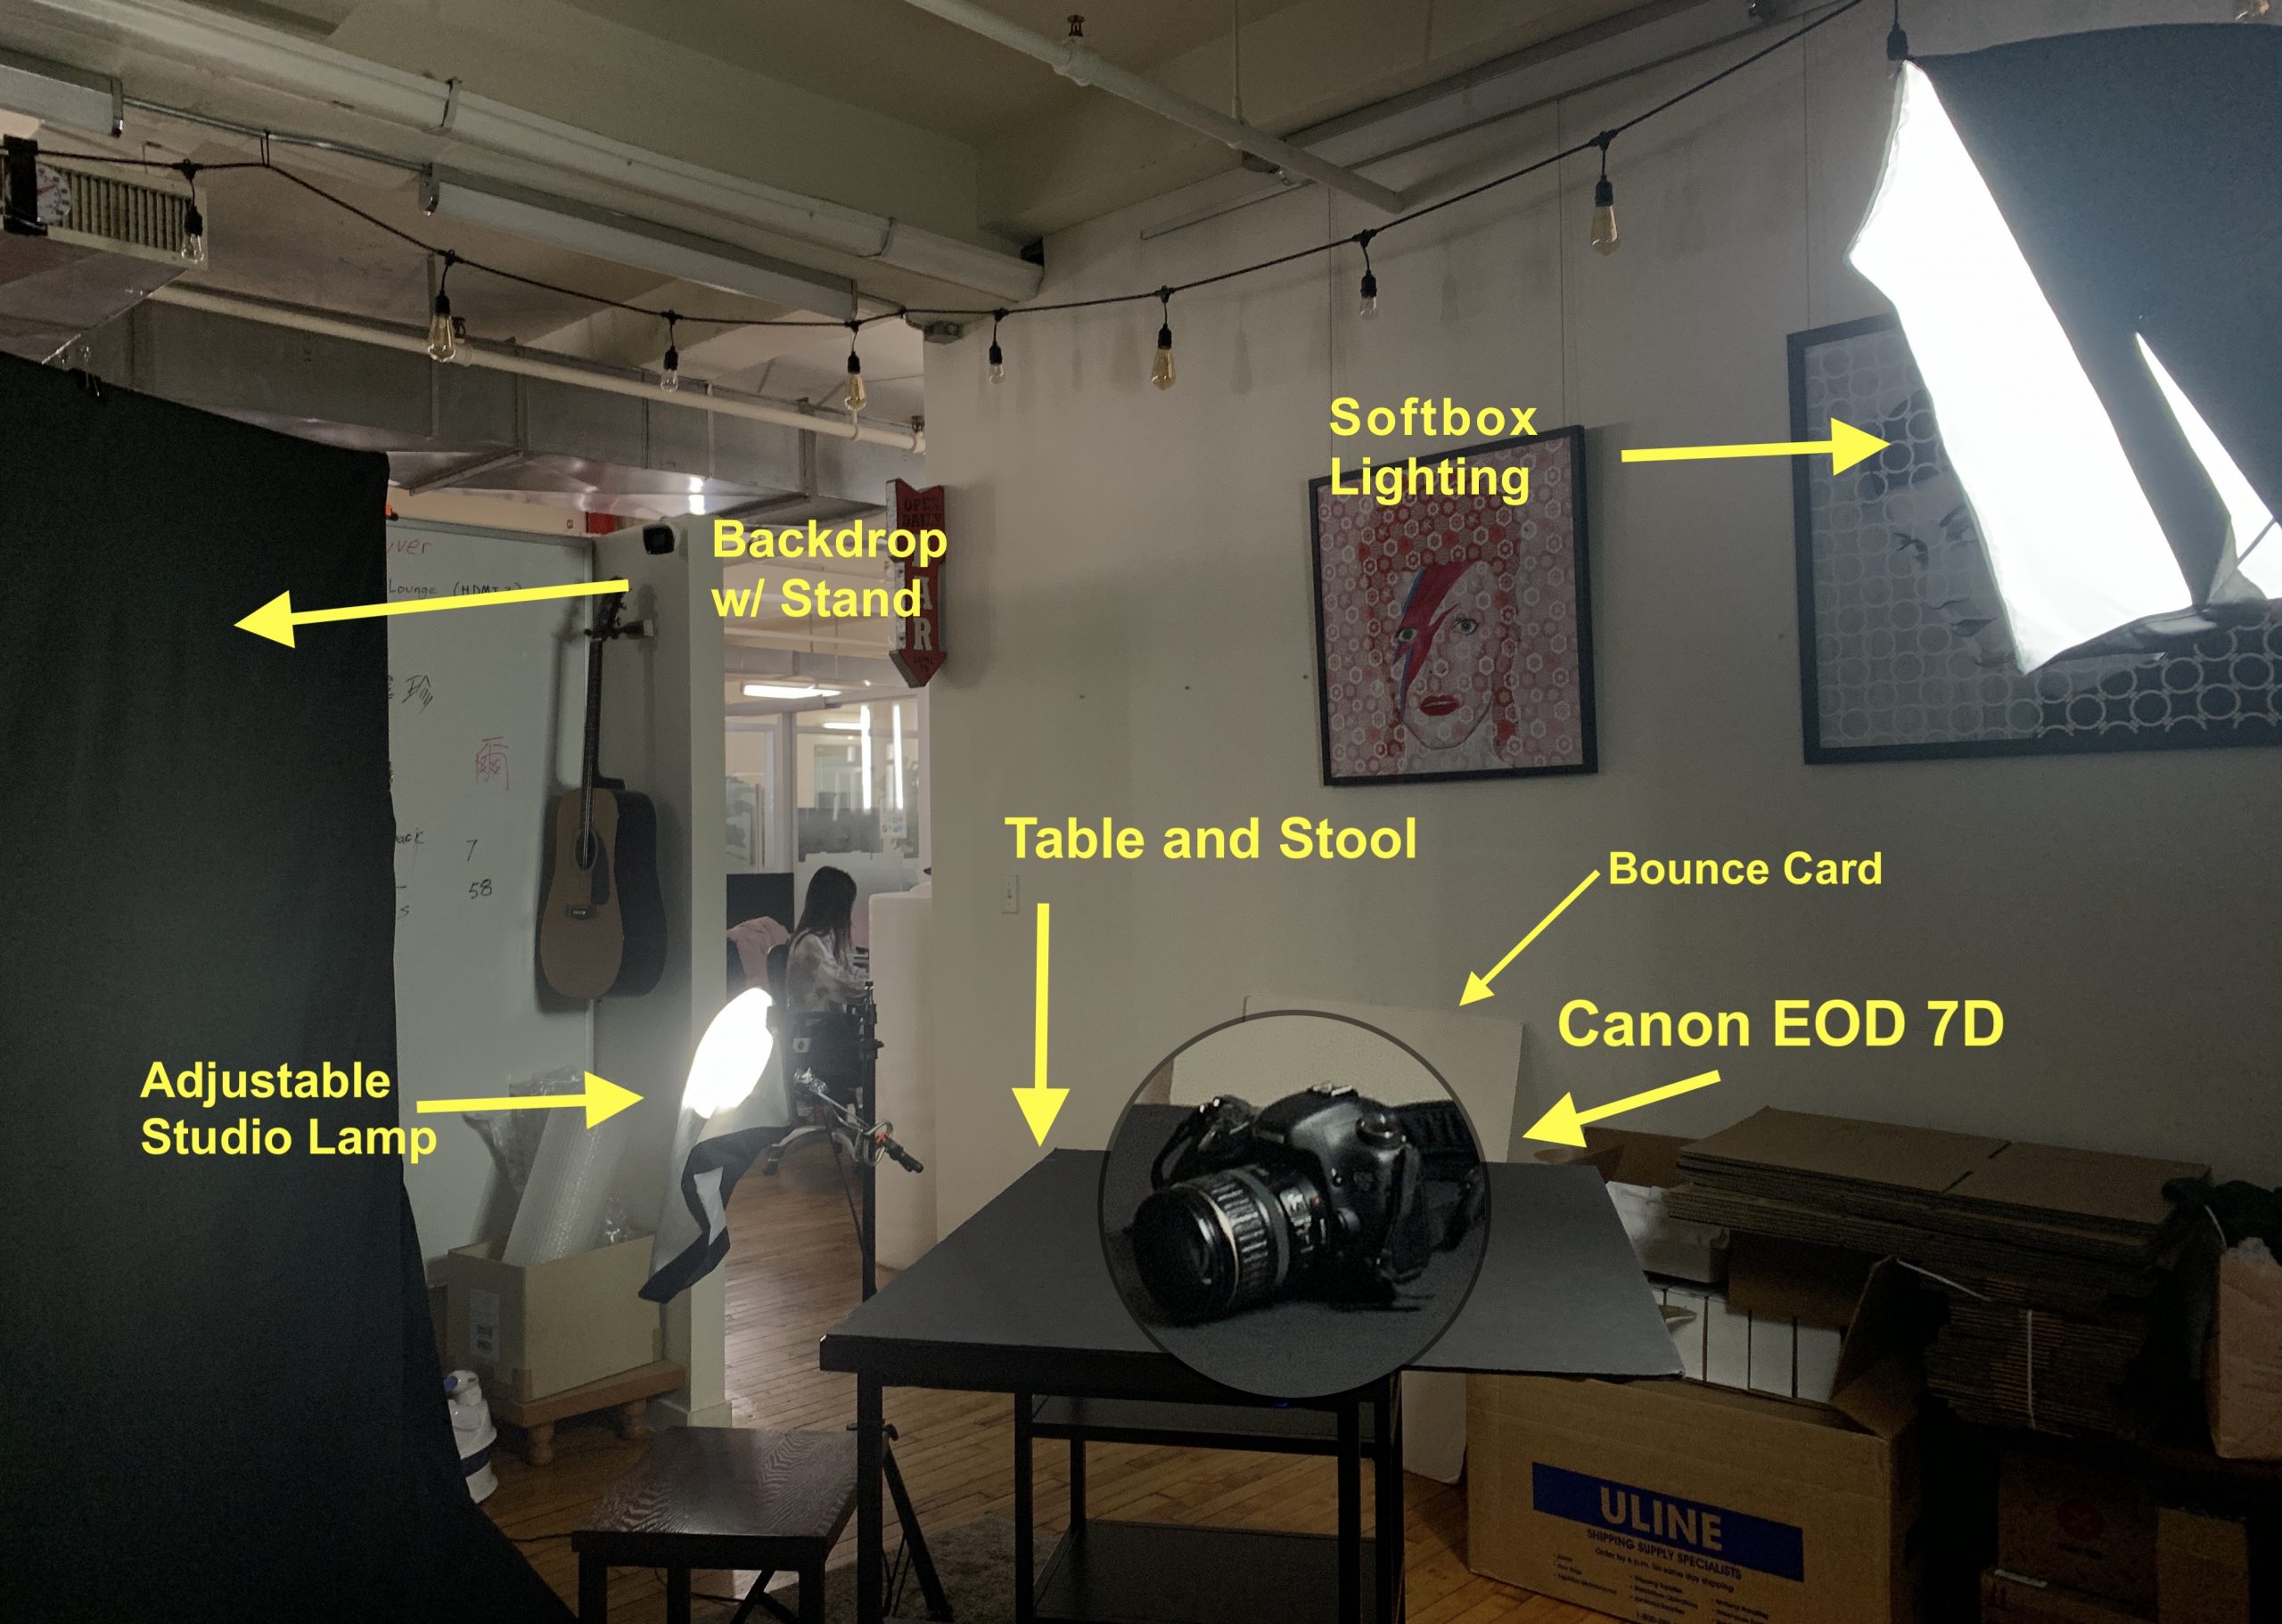
What we used:
- • Canon DLSR EOS 7D
- • Softbox Lighting
- • LED portable light
- • Black Backdrop w/ Backdrop Stand
- • Adjustable Studio Lamp
- • Bounce Card
- • Table and Stool
- • Extension cords
- • Gaffer tape, clips, clamps (etc.)
Nice-to-haves:
- • Makeup & Hair Stylist
- • Costume/Fashion Stylist
- • Set Designer/Prop Stylist
- • Production Assistant
- • Light meter
- • Sandbags
Isabel’s Tip: It’s important to note you should try to select gear according to what you’re shooting and what your ideal look/aesthetic (ie. 35mm/50mm lenses are standard for portraits but you can also shoot with ultra-wide angles for big sweeping shots). You can go minimal or maximal, but either way, adding artistic flair and making do with what you have can be a really fun and fulfilling challenge.
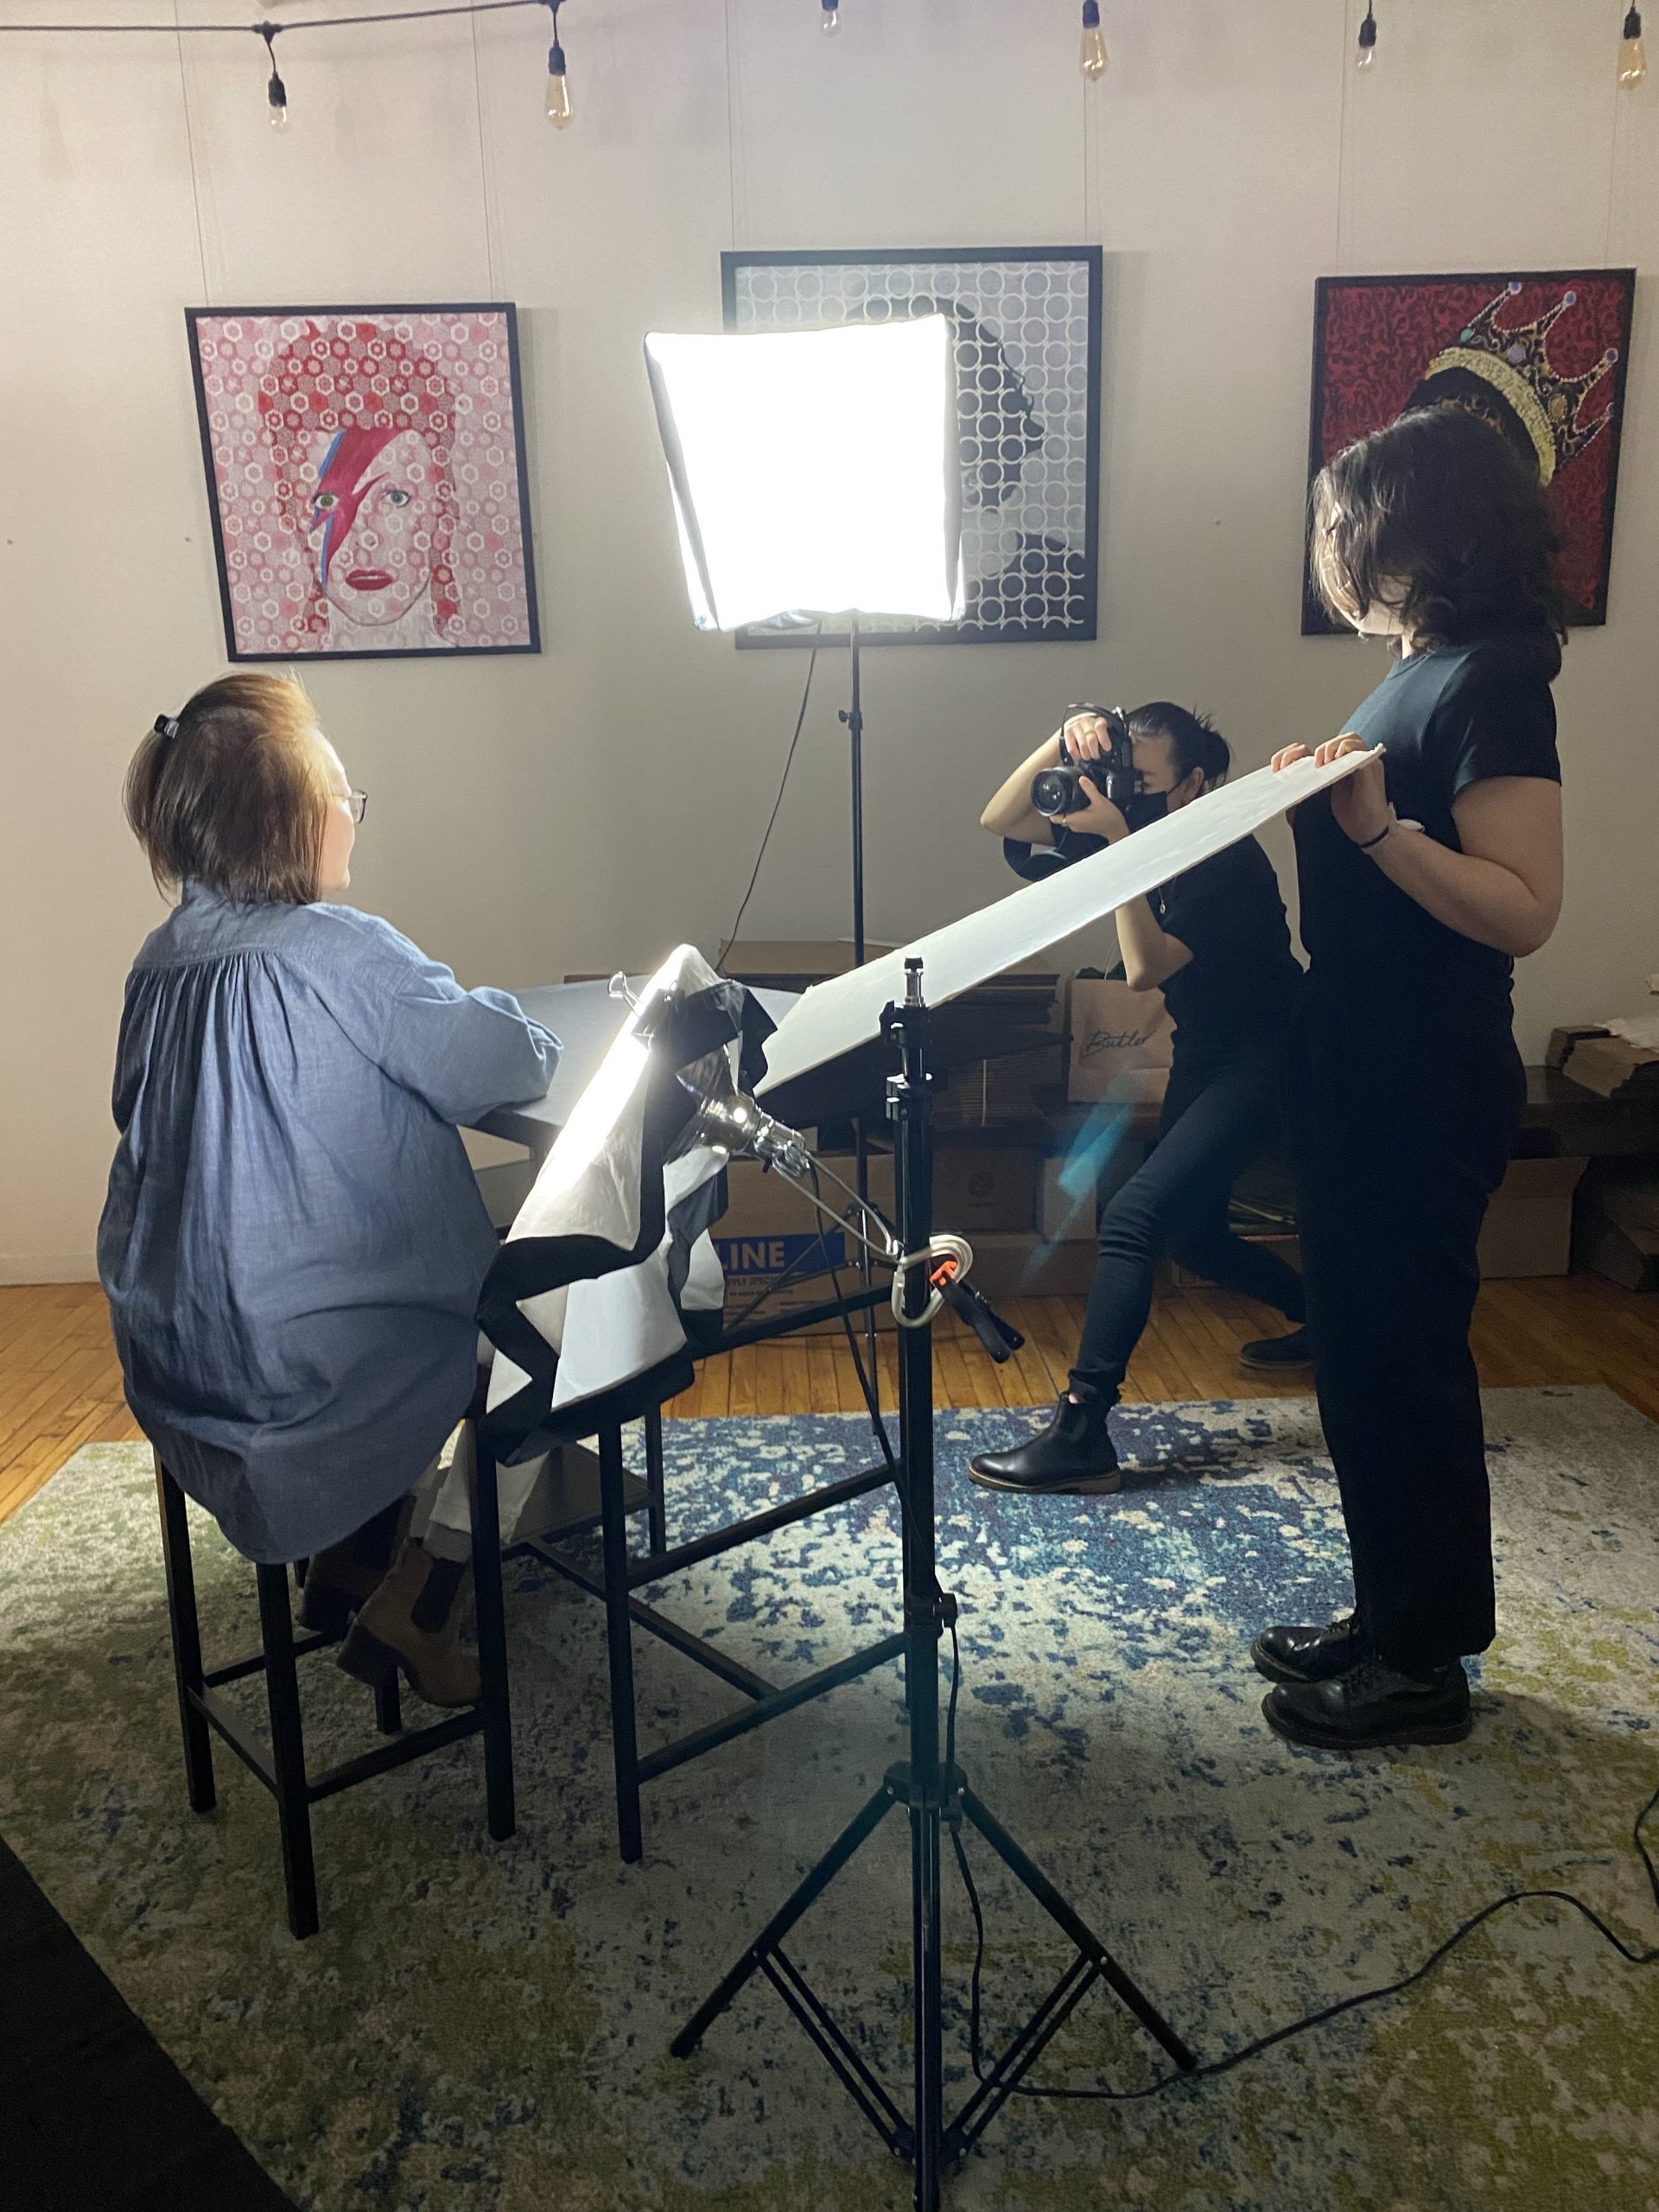
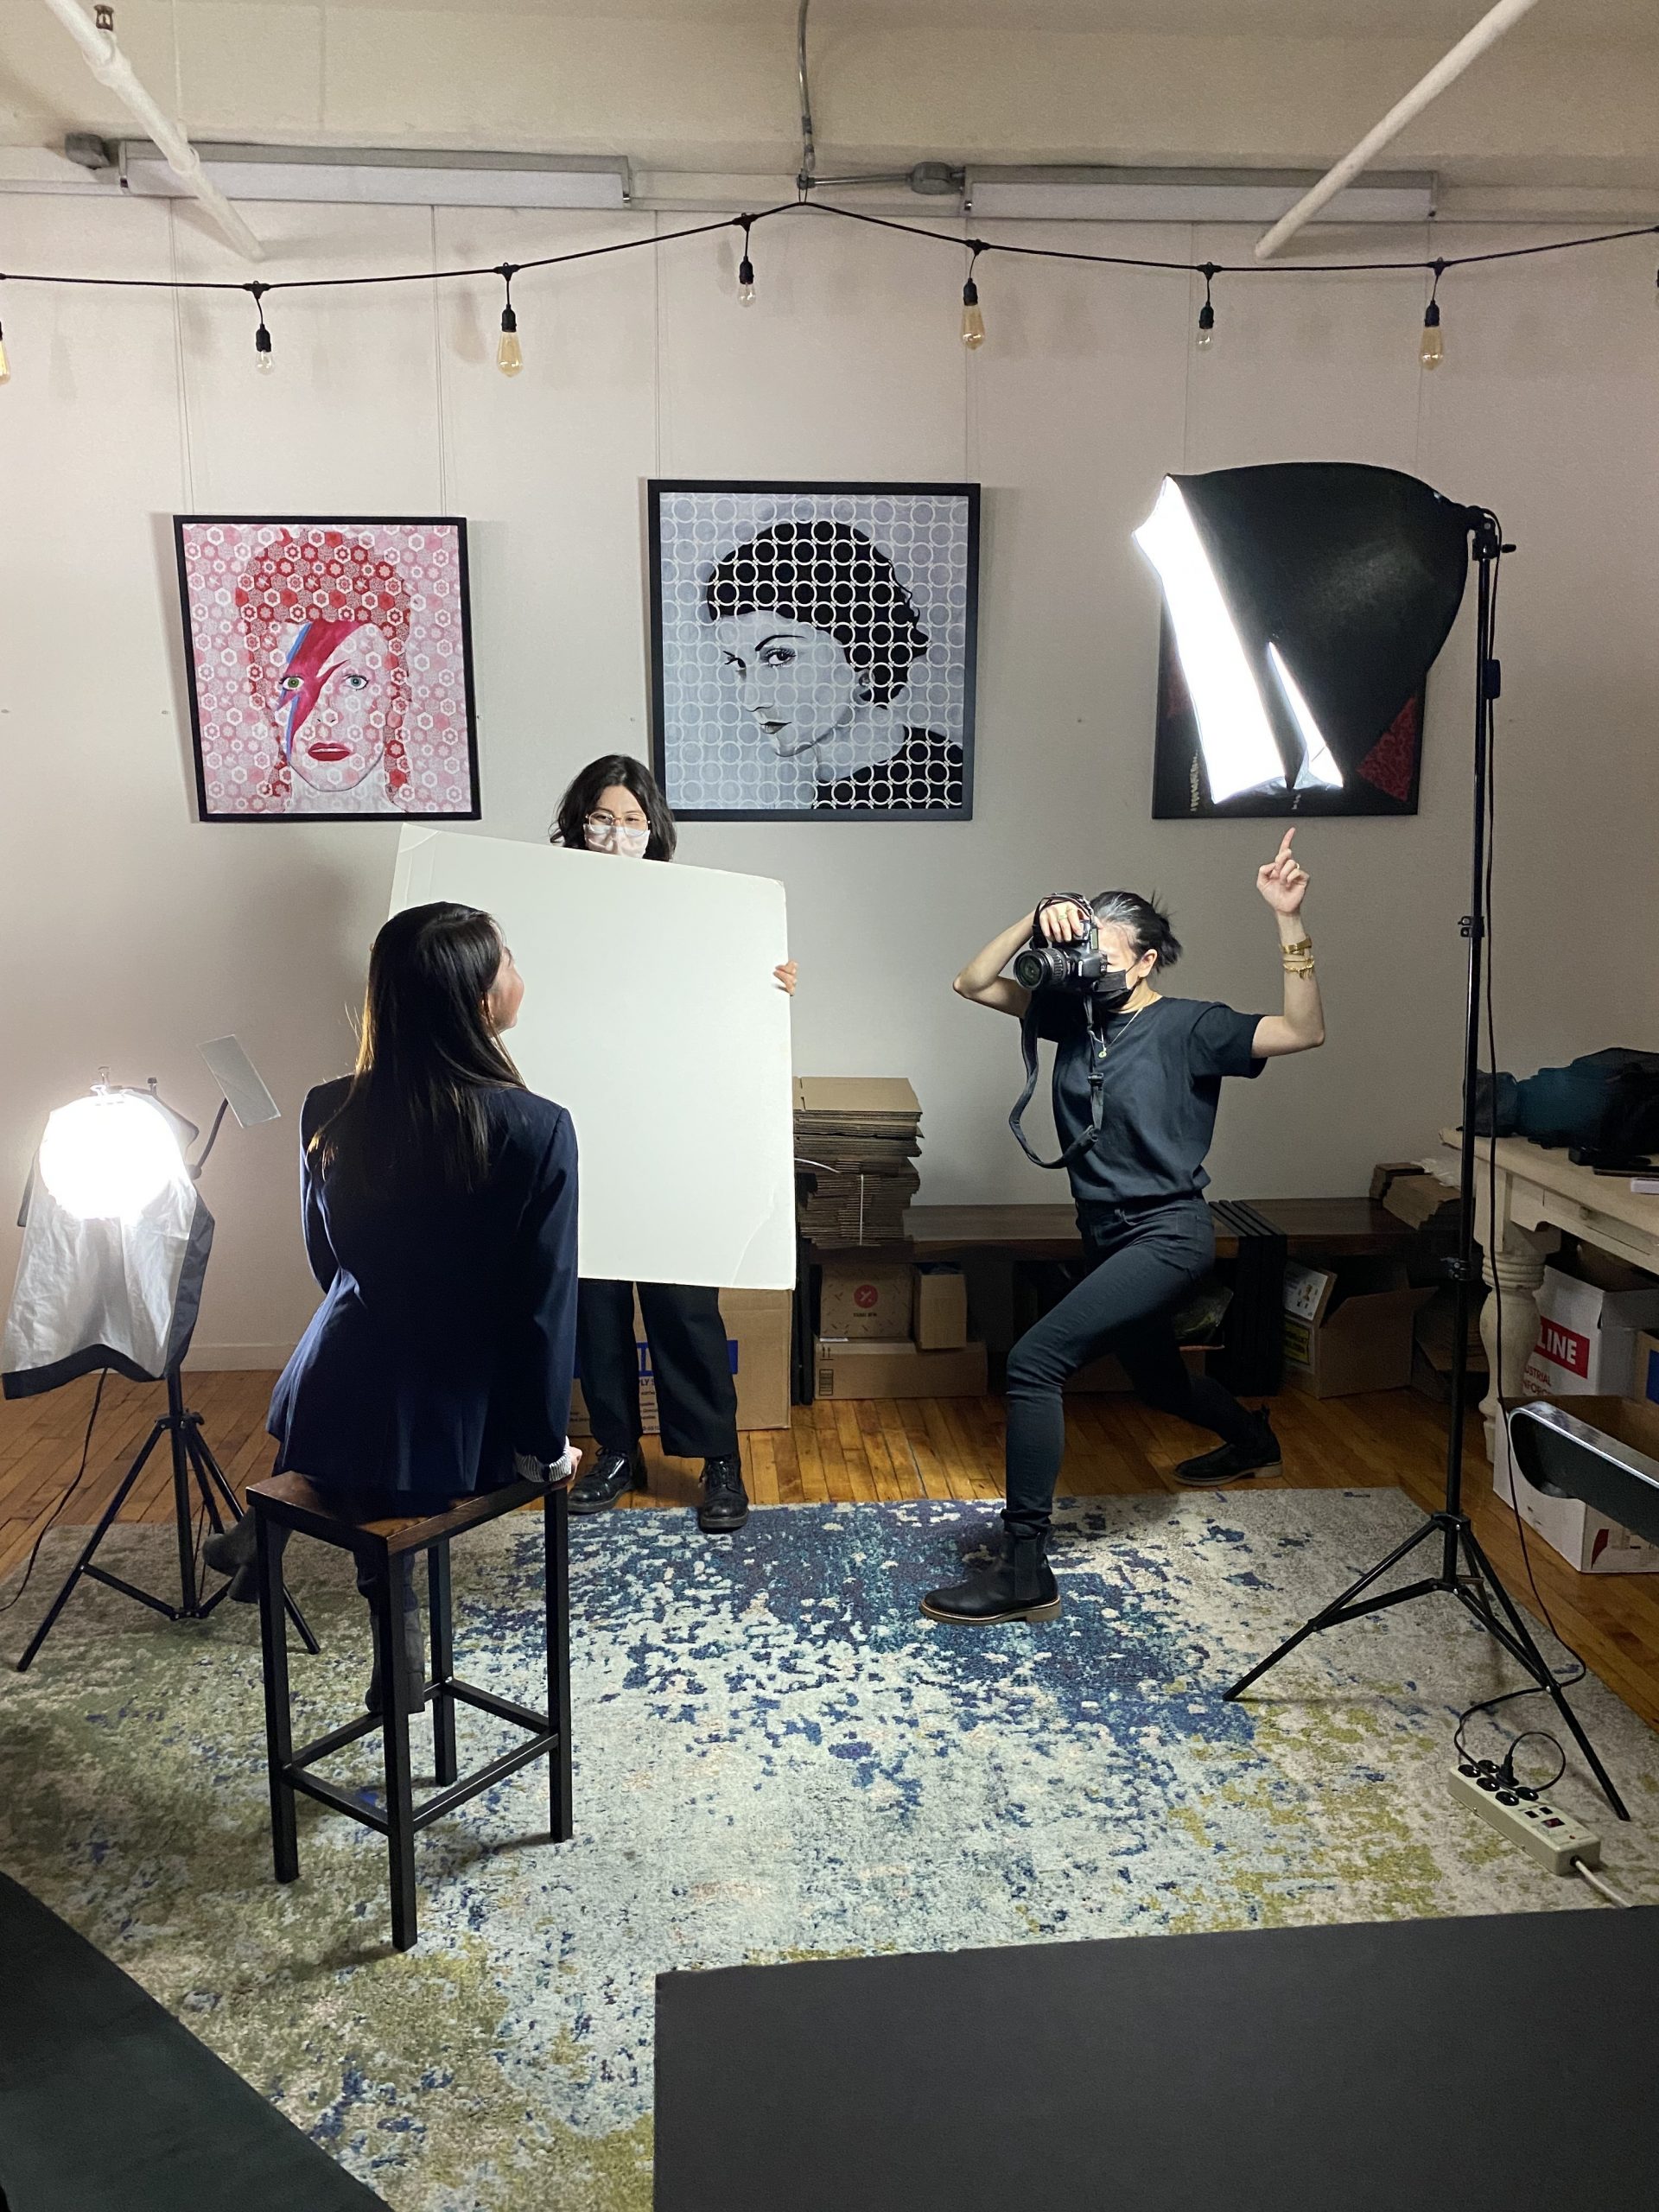
Step 3: Lighting
Perhaps the most important step before shooting is lighting. Lighting can create the tone of your project and usually needs to be adjusted based on the set, pose, and angles. We used 2–3 sources of light and a bounce card (white paper/board). While all the final shots looked very similar and consistent, we needed to readjust the lighting’s contrast and placement for almost every shot.
- • Softbox lighting is ideal for portraits. Have at least 2–3 for even lighting but you can get away with just one if you don’t mind a more dramatic look.
- • Natural lighting is a great option, but since you’re chasing the light, it’s best to plan your schedule around the way a room is lit by the sun throughout the day. South-east facing windows will usually get the most direct daylight from sunrise to sunset.
- • Try a diffuser in case your lighting is too harsh/strong.
- • Use a bounce card or reflector to help bounce lighting into shadows to open them up.
- • Sandbags or weights to keep light stands steady and avoid accidents.
Step 4: Camera Settings
You’re almost ready, everything is set, your lights are adjusted, but what about your camera? Setting up your camera depends on your set, lighting, and theme, and may change with each pose or model.
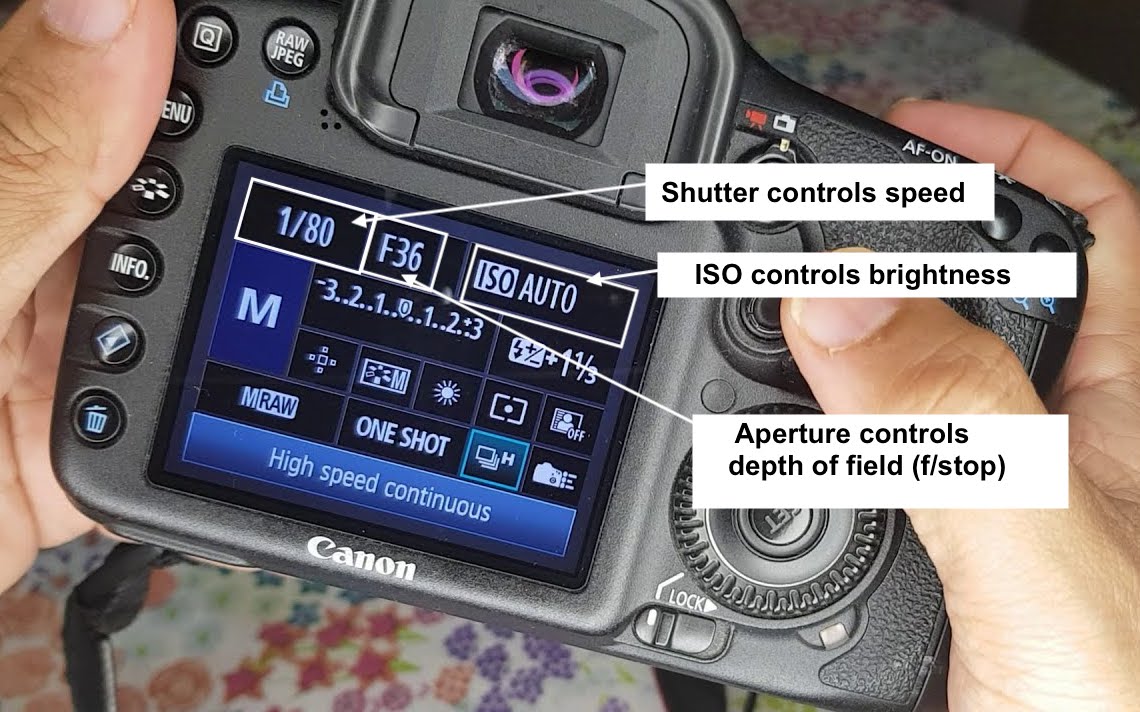
Photo Cred/ @legacy_creative_photograpjy
- • Light Meter (for the shadows so you don’t end up with extremely dark areas, but balance is key so you don’t blow out your highlights either) depending on the lighting. To do this, you would go into your camera settings to set your shutter speed, aperture, and ISO.
- • Try not to bump up the ISO too much if it’s not necessary. The higher the ISO, the noisier or “grainy” the image will be.
- • Shooting in RAW will allow you more leeway when editing in post. Remember: Bigger file → more pixels → easier to fix while editing!
Isabel’s Tip: Low light settings can be restricting depending on your camera & lens specs. Despite how high you may bump your ISO or adjust your aperture, sometimes you’re still forced to set your shutter speed to be a lot slower than you’d like. Tripods are a good tool to keep your camera steady if your body isn’t.
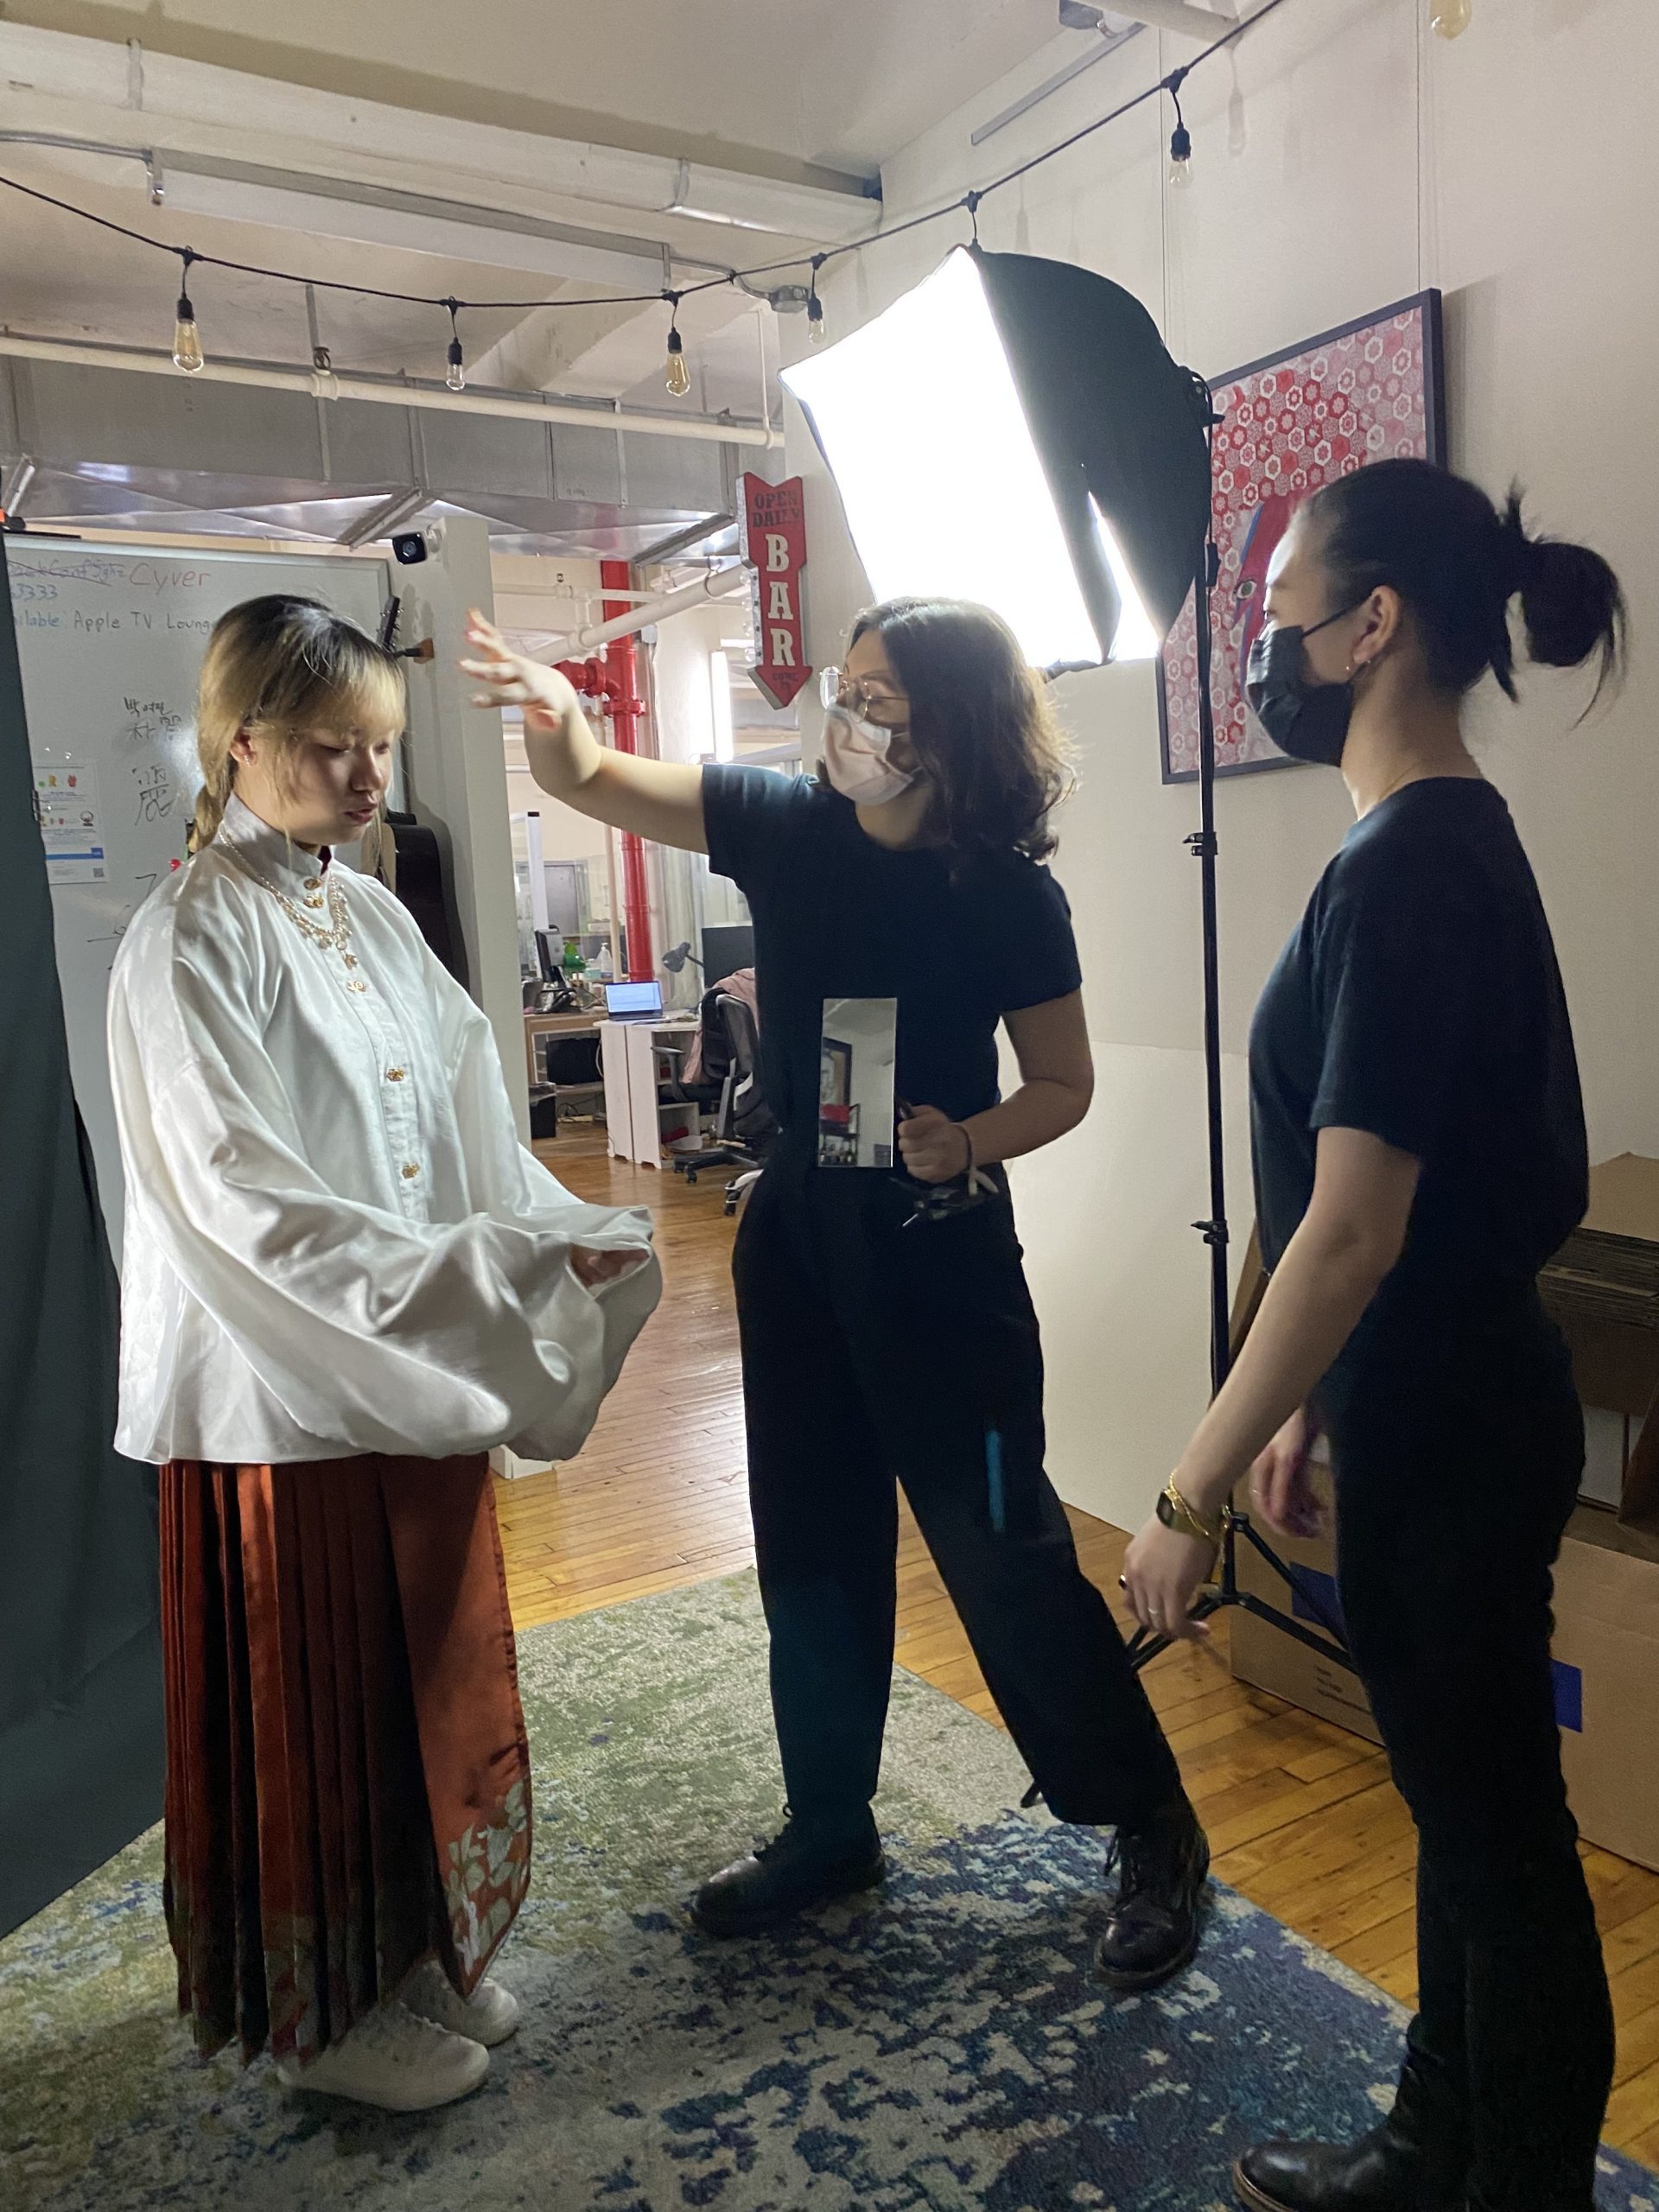
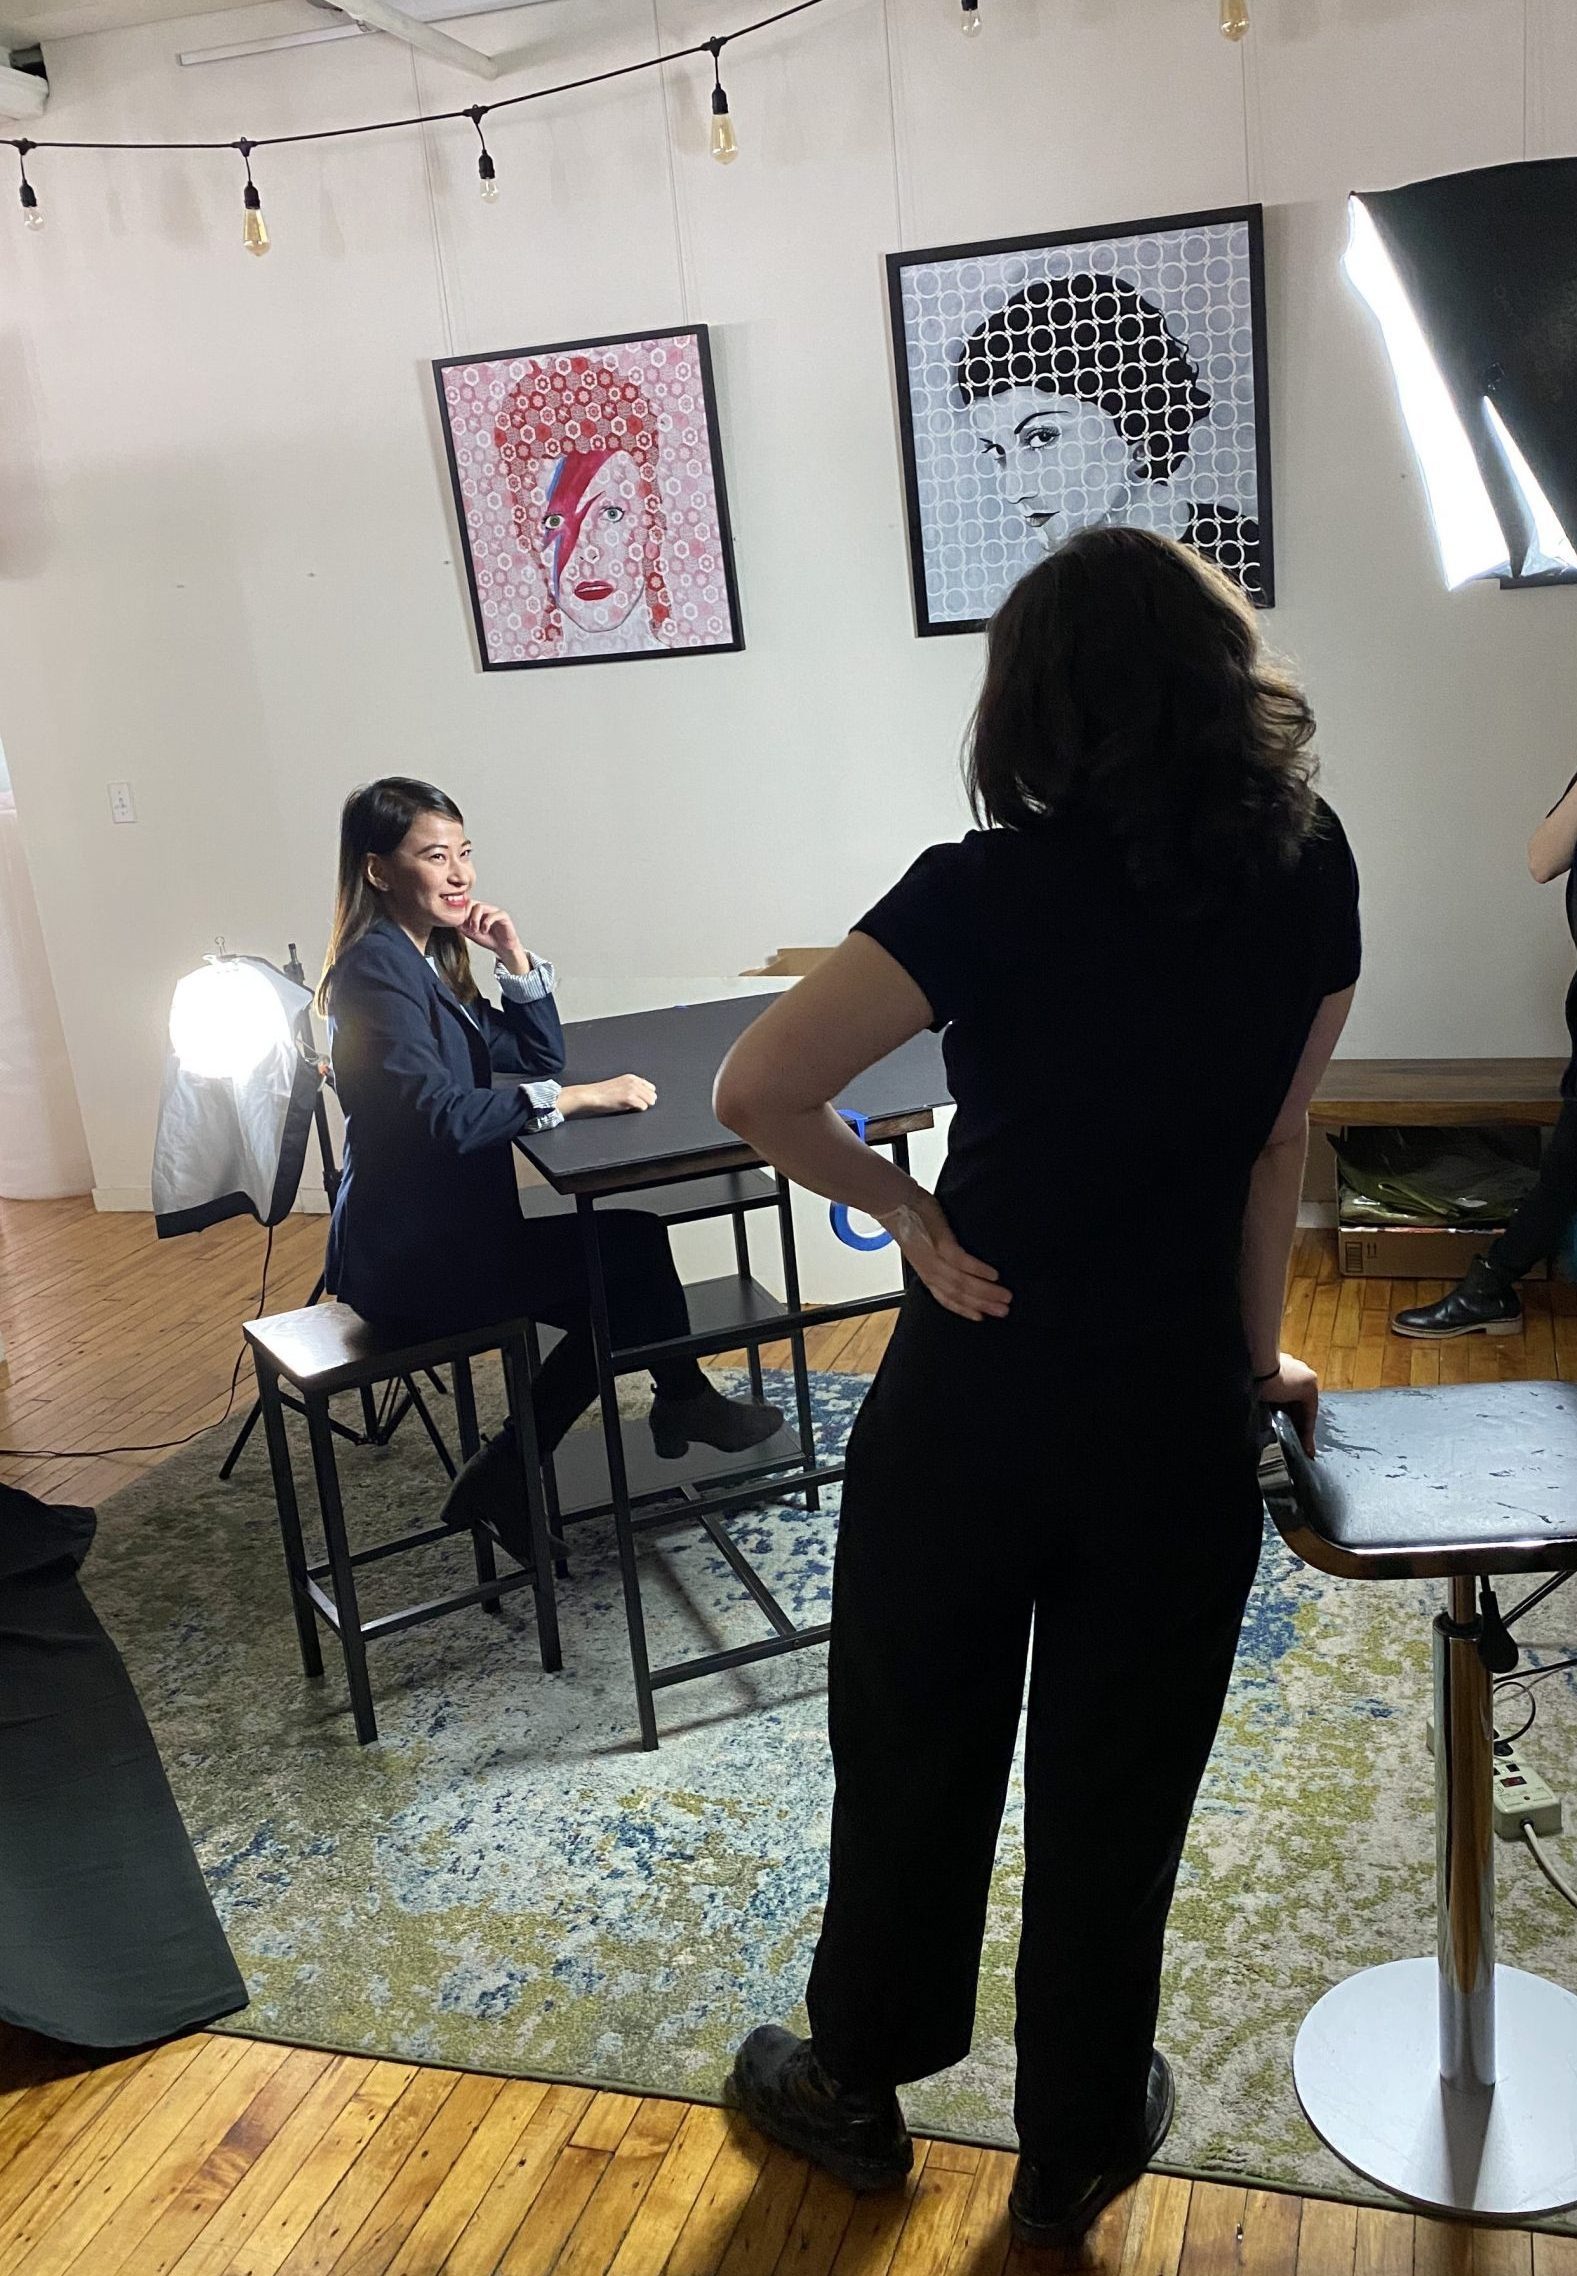
Step 5: Shooting
With everything finally ready, it’s time for the shoot. Here, communication is key. Working with models who are used to being in front of the camera and knowing their angles is always ideal but not required (or always possible). Have a conversation with your subject, and try to get to know them as a person so they’re comfortable. Ask them to sit on a stool or box, lean against a table, or suggest putting their weight on one leg if they’re initially too stiff. Always compliment and crack jokes to loosen them up. Play music throughout the shoot. If they favor certain sides or angles, capture those but don’t be afraid to ask them to change their position and give direction. Make sure to keep track of time and take breaks when needed as photoshoots can be tiring!
Isabel’s Tip: Always have SD cards with plenty of storage. However, if you’re really running low on space, JPEGs will not hurt you for digital use (it will if you’re trying to print to billboard size though…).
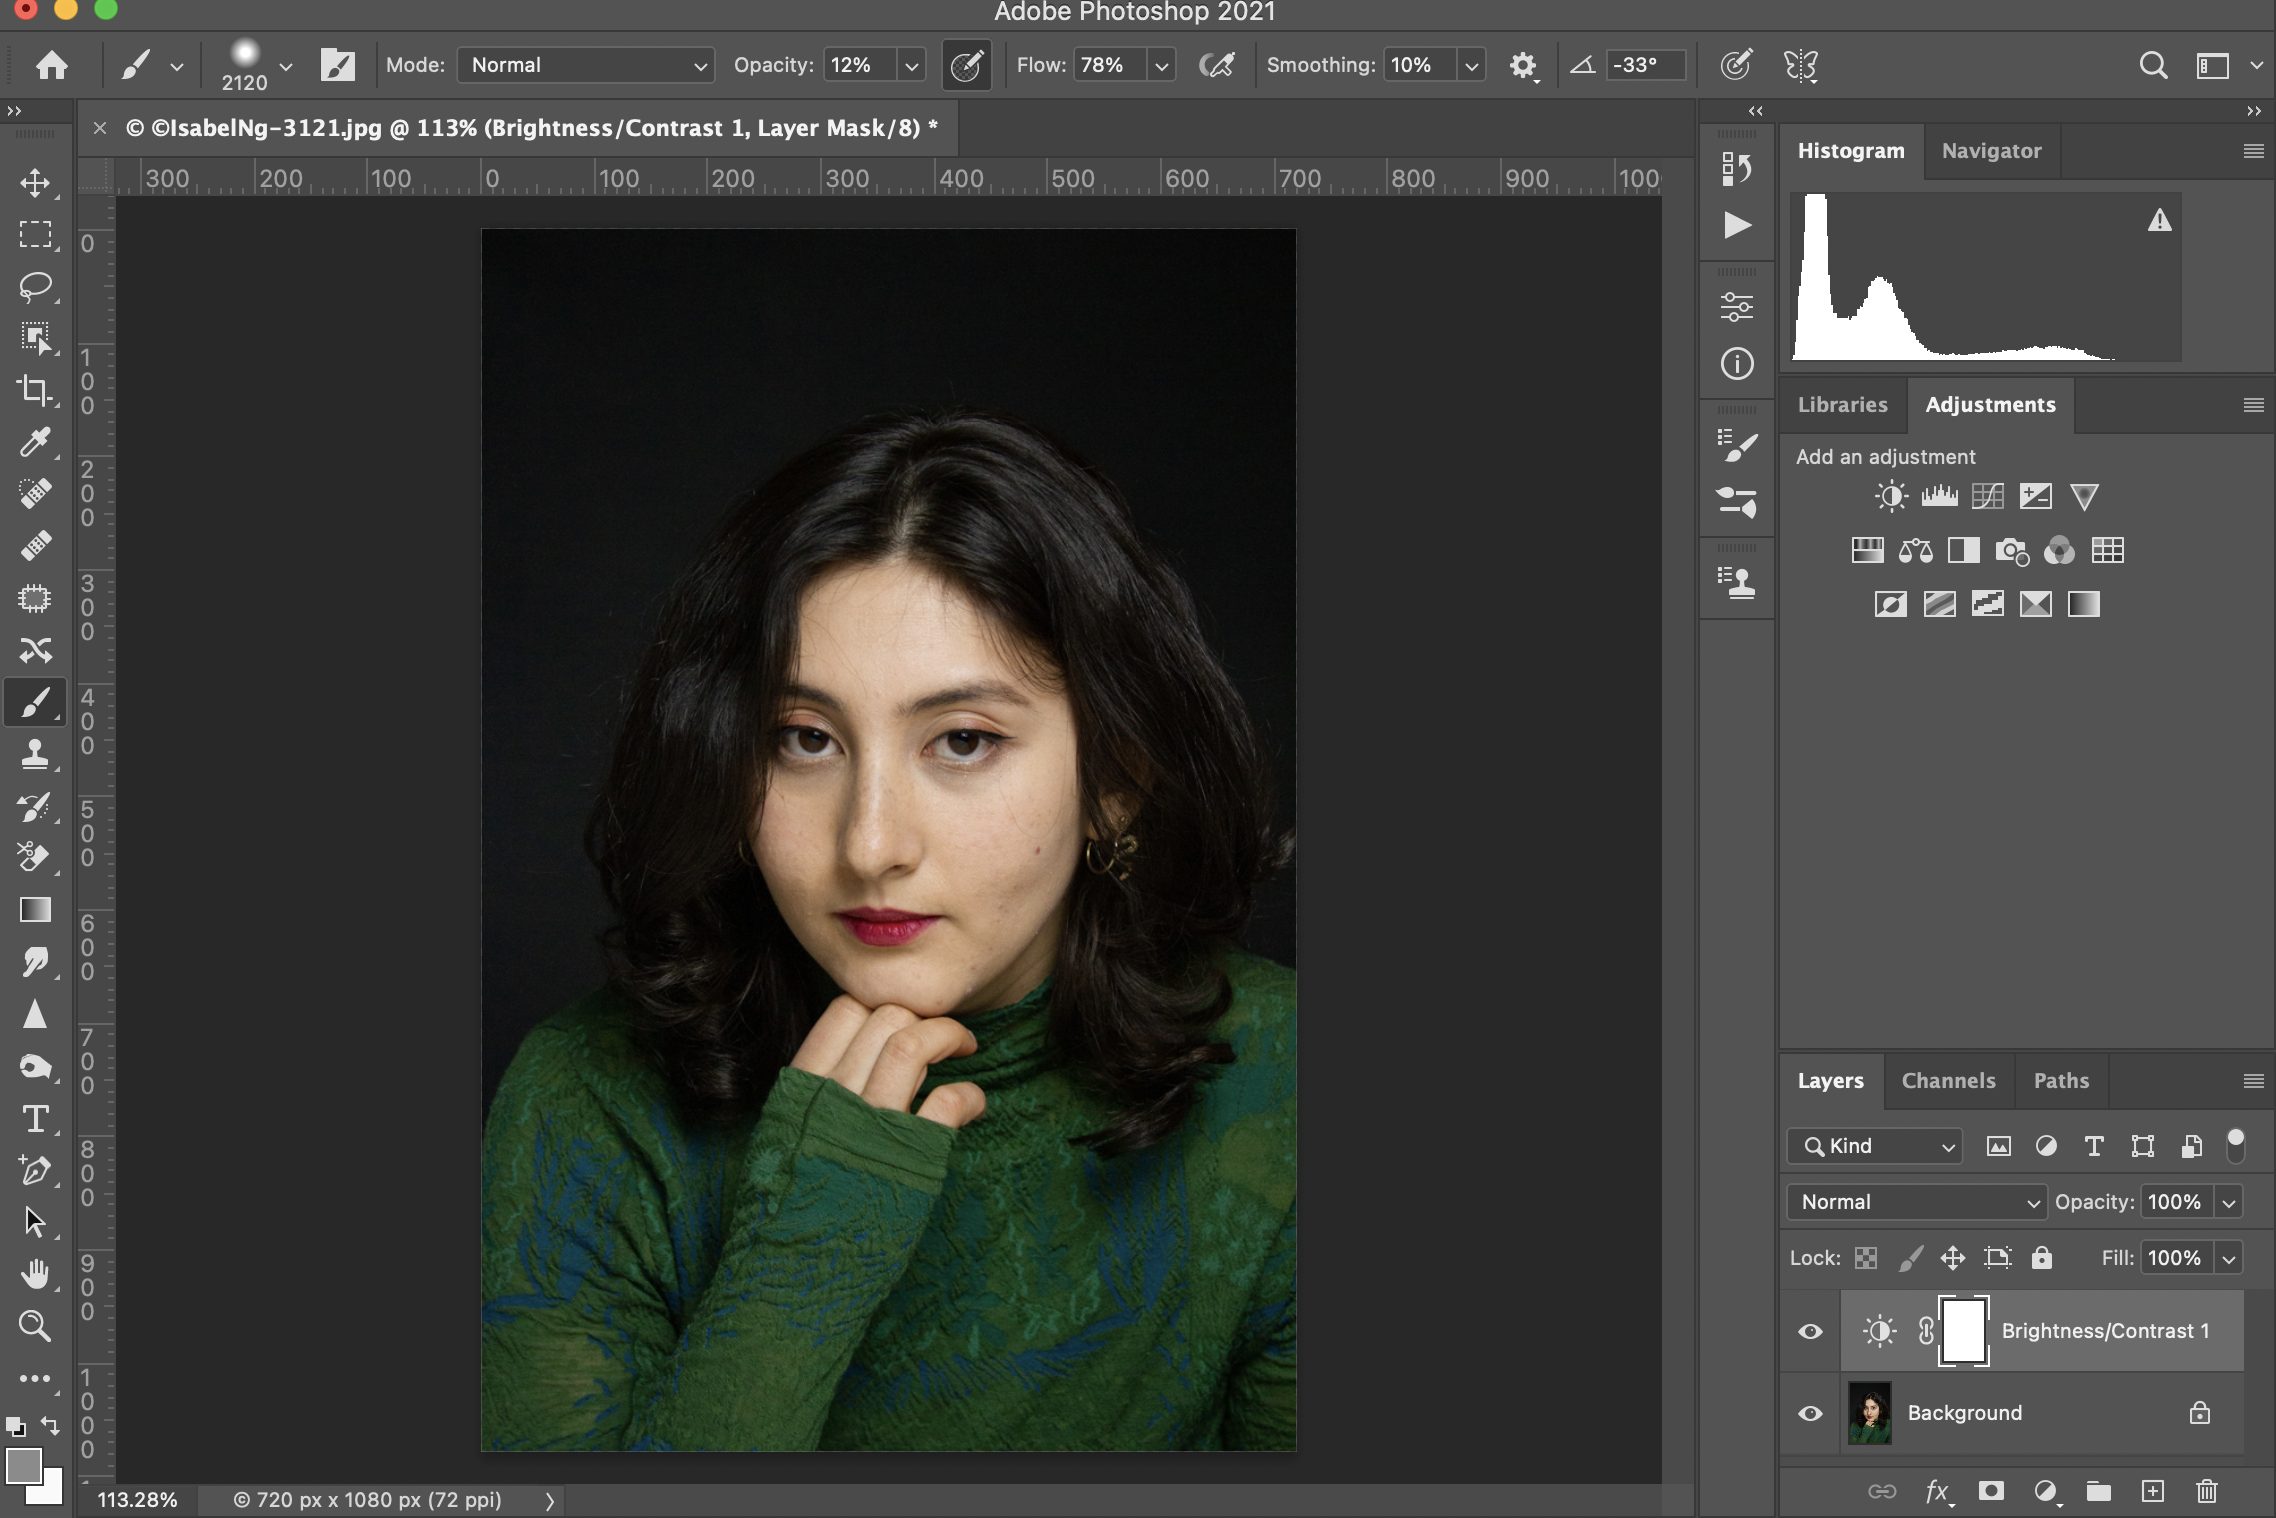
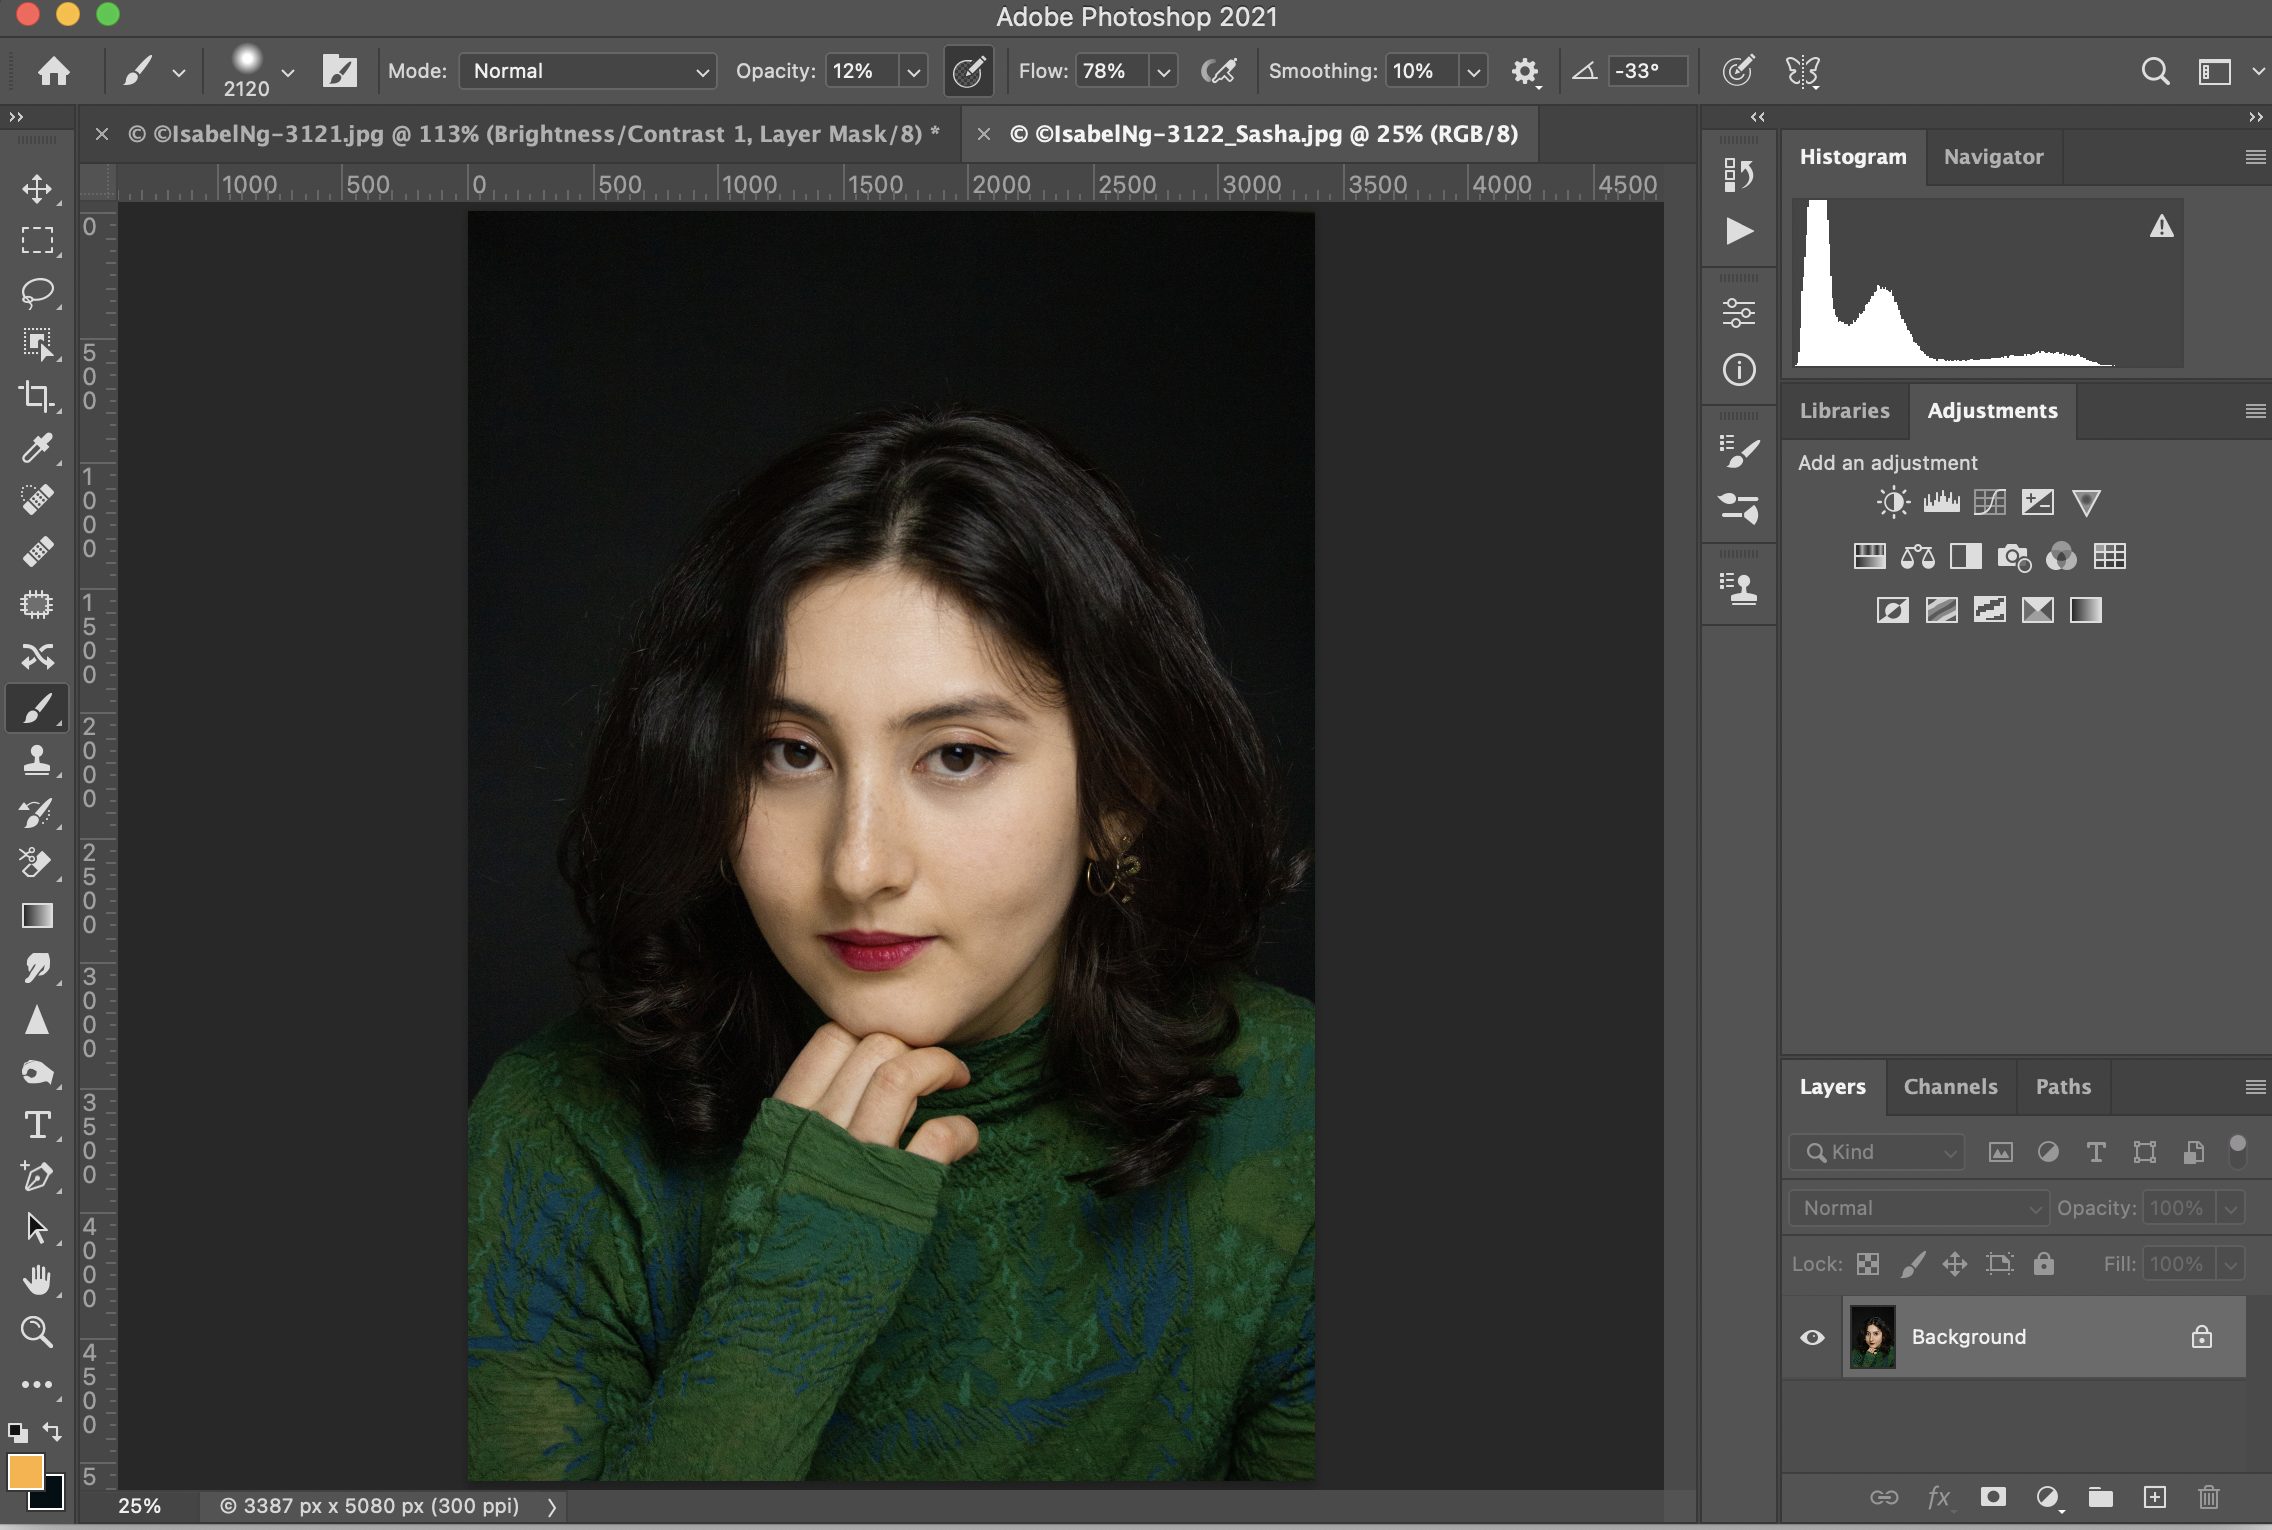
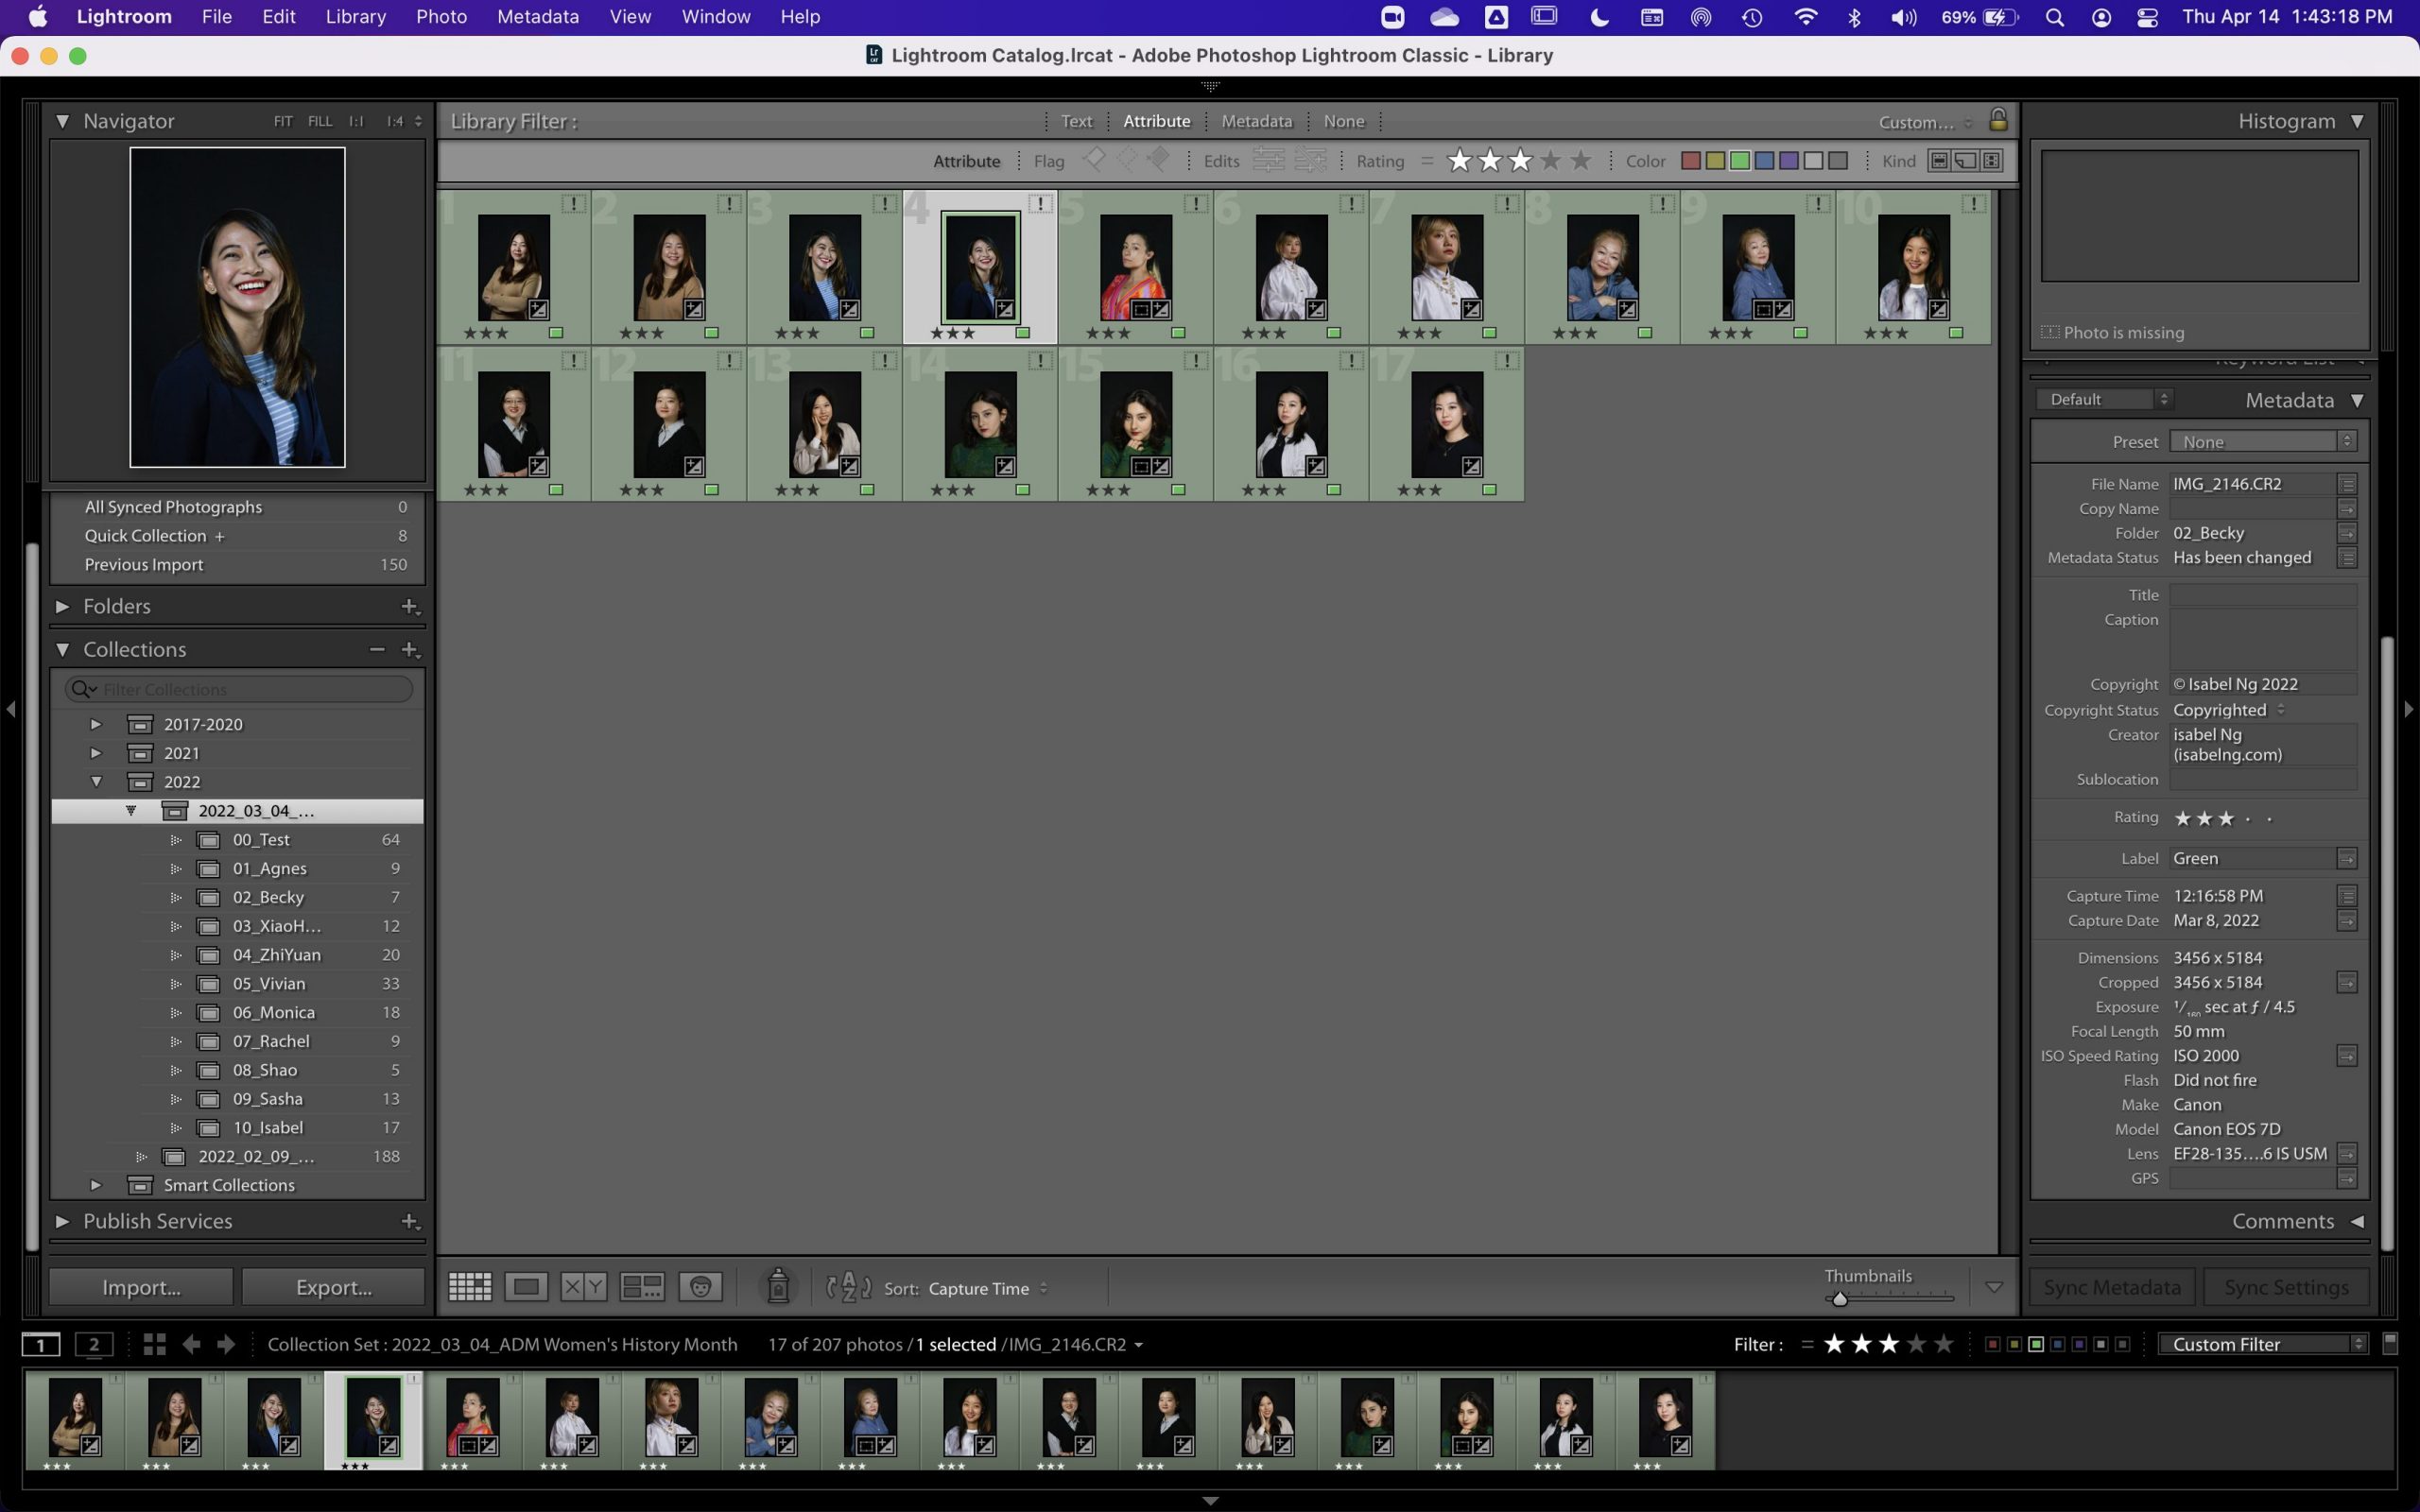
Step 6: Editing
Perhaps the most time-consuming part of a photoshoot is editing. Pick out your favorite shots from the shoot beforehand and use your software of choice. For Isabel, she used Adobe Lightroom and Photoshop.
- • Lightroom is best for basic and batch post-processing, including color, contrast, exposure, and cropping.
- • Photoshop is best for detailed post-processing, including blemish removal, fine-tuned adjustments, and complex artistic edits.
Isabel’s Tip: I primarily will use Lightroom to pick my selects and color correct them in bulk. This is usually enough for event coverage and when I don’t need to make major modifications to an image. If I need more detailed retouching, especially for portraits and products. I’ll then export and upload them into Photoshop for fine-tuning or more artistic editing.
Conclusion
The International Center of Photography has amazing photography courses and workshops online or in-person in New York City. Isabel highly recommends visiting the museum and enrolling in their programs to learn more about the history, techniques, portfolio building, and conceptual thinking behind photography.
Anyone can learn photography basics and technical skills, but training your eye to create a strong and unique image is what really makes a photographer stand out. Get inspired with reputable photographers’ work, collaborate and learn with friends, and consume other art styles and cultures to broaden your mind with different ideas, concepts, and inspiration.
Check out Isabel Ng’s work here: http://www.isabelng.com/
Social Media Coordinator&
ADMERASIA
sashab@admerasia.com
Racism Is Contagious by ADMERASIA – a platform that provides consolidated, impactful tools to combat the spread of hate crimes against the Asian American community. Visit https://racismiscontagious.com/ to learn more.
ADMERASIA’s winning spot, INVISIBLE, shows why it is time to tell better stories about Asian Americans. Take the pledge. Visit www.threeinfive.com to know more.

